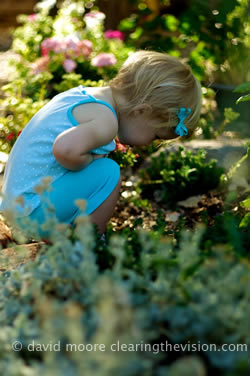
I’m always pleased if you hire me to photograph your children, but most people don’t live in Santa Fe or Albuquerque, and based on the ‘teach a man to fish’ theory I’m keen to share what I’ve learned with as many people as possible
I think everyone can take better pictures of their kids, regardless of the camera they have or their experience.
So here is the first in a series of tips for taking better photographs of children.
None of these first tips require adjusting your camera’s settings in any way except zooming in and out.
I’ll get to more technical tips later, but often the biggest improvements come from taking a more thoughtful approach to what you’re photographing.
And that won’t cost you a penny in new gear.
1) What are you trying to say?
As the photographer and writer David du Chemin points out, a good photograph isn’t just a picture of something, it’s a picture about something. This might sound like splitting hairs, but bearing this in mind is the single biggest thing that will improve your photographs. You can have all the technical craft in the world, unless you know what you’re trying to capture and communicate then your photos won’t have much to say.
Which is why I don’t like formally posed shots very much because arranging people in a pattern and making them smile often only says ‘they made us smile, and look how awkward we are’.
You know your own children better than anyone. What is it about them that you find fascinating or that melts your heart? What is it in their character makes them you, and how do you feel about that? It could be as simple as wanting to show how beautiful you think they are, or how funny. Or you might love the serious concentration they devote to their painting. Whatever it is, that’s a good place to start. Imagine you were a photojournalist given the job of producing a set of images that showed some key aspects of your child – what are the activities, moods or emotions you’d like to communicate?
Kids don’t fake it well, but they’ll try if you ask them, or they’ve got their ‘photo smile’ they’re used to rolling out when a camera appears. You’ve got to get past that and let them get comfortable and/or distracted by something else before you’ll have the chance to capture something more meaningful.
Of course, even though you’re taking a picture of them, you’re also saying something about you if it’s an image with some intention behind it. There’s nothing wrong with that, of course, but it might be something you hadn’t thought much about. Even if you’re just reacting to what you see in front of you and shooting spontaneously (sometimes especially because of that), what you choose to shoot and what makes you press the shutter at that instant and not another can show a lot about you.
This might not be the most practical bit of advice, but all I’m suggesting is that you ask yourself ‘what is this picture about?’ as well as ‘what is this a picture of?’.
2) Go low or high
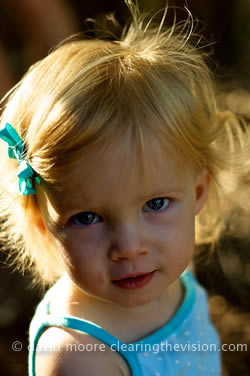
If you stand up and shoot from your normal height, you’ll get a bunch of shots with a slightly unflattering angle and no real energy to them.
They’ll look like the way you see your child most of the time.
So I recommend getting down to their level.
That might mean scuffing the knees of your trousers, but it’s worth it as it gives you a clearer and more immediate way in to their world.
One exception to this is a shot where you stand right over the boy or girl and get them to look up at you.
This lends the kid a vulnerable air and can look very sweet.
The other exception is to get below them – easiest when they’re climbing on stuff in a playground.
Even if they’re not very high off the ground, if you squat down so they’re above you, include lots of sky and no ground, and you’ve given your little adventurer a more heroic look.
Either way, don’t just stand there and shoot.
3) Get in tight
Figure out what’s the most important thing in the picture, and fill the frame with that.
That sounds obvious, but when we look at things with our eyes we tend to filter out the periphery without really thinking about it. The same goes with looking through a viewfinder or a screen on the back of a camera.
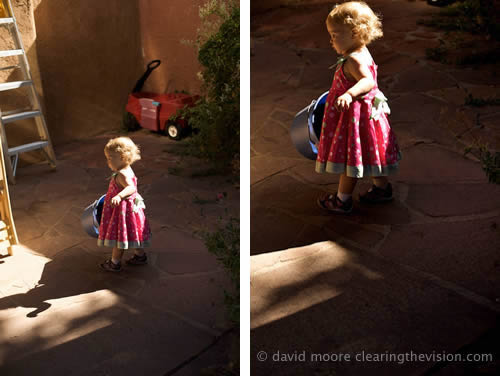
If you’re only looking at the most important thing, you might not notice at the time that there’s a bunch of other stuff in the frame. But you will notice when you look at the image later. So get into the habit of checking what else you’re including in the frame before you press the shutter.
If you don’t need the material to show some context, zoom in to the important thing (often a face) to cut out the clutter. This can be zooming with your camera, or if you’re using a prime lens (one that doesn’t have a zoom), you’ll have to ‘zoom with your feet’ aka walk in closer.
Some of the time you can do this in the camera, and get a perfectly composed image straight off. But I’m not that good, especially if I’m chasing after a child, so cropping (and some of the other adjustments you see) can obviously be done after the fact, too.
4) Don’t leave much headroom
If you’re taking a photo of a single child, it might seem most natural to put the kid’s face in the middle of the frame. Many cameras’ autofocus feature encourages this, as you put the thing you want to focus on in the middle of the frame, then press the shutter half way down to focus.
If you take a picture like that, you’ll obviously get a lot of background in the space above the child’s head. And because the face only comes halfway up the frame, it won’t be very large.
But (related to the get in tight point above) there’s something much more satisfactory about having the top of the head near the top of the frame. The face is larger, there’s less distraction above the head and it looks like you meant it. The easiest way I can tell the difference between someone who’s just taking snapshots and someone’s who’s thinking about what they’re doing is that there’s no room above people’s heads in the photos they take.
5) ‘The centre is for God’
So you’ve got the top of the head near the top of the frame. But the kid still has an equal amount of space on either side of them. Sometimes this works, if its a powerful symmetry you’re after.
Most of the time however a better option is to recompose the shot so the key element is on one side or the other. As photography teachers say, ‘the centre is for God’.
How do you decide? If the subject is looking in one direction then giving them more room to look into often feels better. The same with motion – if someone’s moving across the frame, then space ahead of them to move into lends the scene some dynamism. Sometimes the more practical matter of cutting out something distracting will dictate which side the subject be.
This ties into the famous ‘rule of thirds’ you’ve probably heard of. Simply put, it’s more visually dynamic to align key elements in your image along imaginary divisions of the frame into three horizontal and three vertical areas. Placing things at the intersection of these lines is particularly strong.
6) The part for the whole
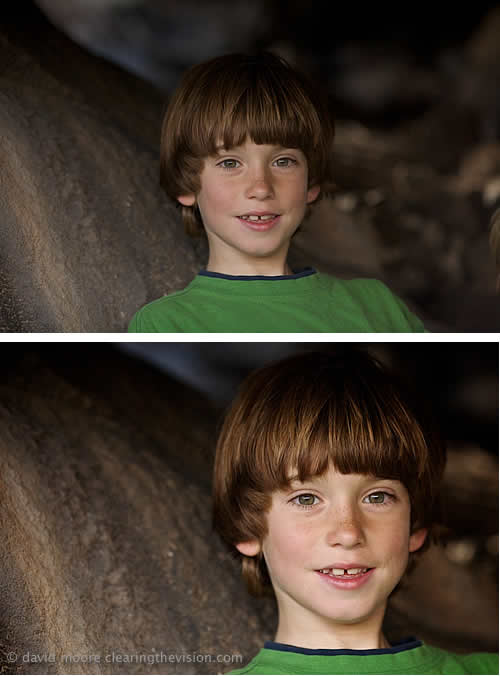
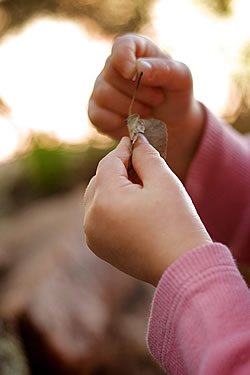 Sometimes parts of a subject are all that’s needed to communicate something more clearly than the whole.
We’ve also seen those baby portraits of just the soles of a new-born’s feet – a detail that shows the vulnerability and delicacy of the new life.
So look for telling details rather than trying to show the whole scene.
The details might be hands working on something for example, or maybe you leave out the child entirely and show a little of what they’ve been up to.
7) Landscape or portrait?
In other words should you keep the camera horizontal, or turn it through 90 degrees so it’s vertical. A non-committal ‘it depends’ on this one. A head and shoulders shot fits more naturally into vertical frame – it’s not called ‘portrait’ for nothing – but even for this type of image there are occasions when you’d want to break this rule.
For example, if there’s a gorgeous background behind the kid, you might want to show more of that, or taking a shot of a kid sitting on a bench in horizontal alignment would communicate their small size. The long horizontal of the bench emphasised by the horizontal alignment, and contrasting with the smaller vertical form of the kid. (And you’d put the kid over to one side of the bench, right?).
I’ll be writing more tutorial posts like this in the future, so feel free to let me know (in the comments or via email) if there’s particular problems you’re having, or questions you’d like answered.
8 replies on “Seven tips to take better kids’ photos – no matter what camera you have”
Hi David! Wow! These are really really great tips! I wish I knew these tips 2 years ago but better late than never! Thanks so much for sharing these 🙂 Love love love your pictures 🙂
Glad you liked them. The best thing to do is just pick up the camera as much as you can – that’s probably the singe most important tip (and I didn’t include it, whoops).
[…] If you like this, you might also like to follow me on twitter, or read these related posts: Seven tips to take better kids’ photos – no matter what camera you have […]
[…] But a lot more of it was thinking more about what makes a good photograph – watching the light, the background, the subject’s expression (the sort of things I talked about in this post). […]
David,
Thanks for sharing this idea about natural portraits, the photoas talk more of the kids and it says lot about the moment, this tips makes a big difference to the normal point and shot approach from many photographers.
Hector.
[…] photographs with the camera you already have, before you need to splash out on a new rig. Most of these tips, for example, don’t rely on gear of any particular sort and will definitely improve your […]
The very best place will likely be fascinating for me.Thank you!
for this hobbyist photographer whose primary subjects are reluctant grandchildren and two reluctant dogs, these tips on shootings kids are great.