Categories
Children's portraits Tips/Tutorials

Feeling is everything

You want to get great photos of your kids? Remember just one thing:
Feeling is everything.

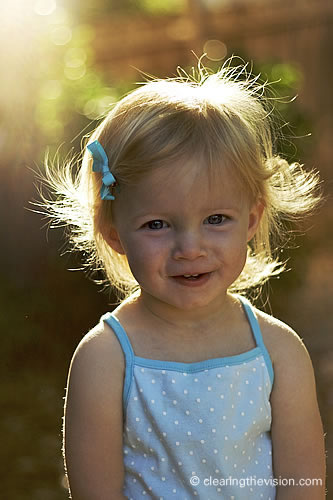
If your pictures communicate real emotion, then it doesn’t matter if they’re not perfectly exposed, or if the background has some clutter – they’re still a hundred times better than a perfectly composed and beautifully shot image that doesn’t communicate anything.

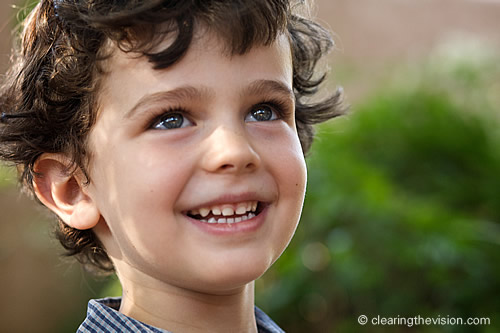
You can only capture that feeling if the kid is feeling it. A genuinely happy child smiles with their whole face, not just their mouth. And cheesing (or is that cheezing?) – that fixed grimace smile that kids adopt at a very young age – is  nothing but a sign that they’re not feeling what they’re pretending to feel.

Not every emotion your pictures communicate has to be happy, of course. A shot of a child concentrating hard on something can be riveting, or an image that communicates sadness can be equally moving.

Not Just One Way Traffic

Of course, the child isn’t the only one doing the feeling here. The images you choose to make and the way you do it says a lot about your mood too.

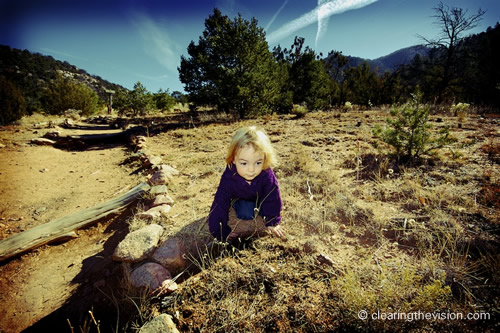
If you’re feeling a little lost or isolated, then placing the child in a largely empty frame with their head turned away can say more about you than them.

But most of the time I’m trying to connect to the emotion of the kids on a shoot – if someone’s shy and reserved, then I’ll be  quiet and gentle too, if someone’s leaping about I’ll try and reflect that energy myself and communicate it in the photographs. But I’m in the final images somewhere, I know.

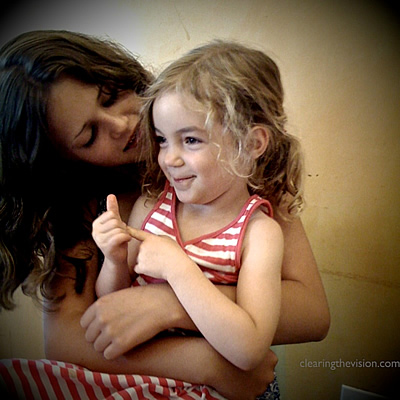
This is one of my favourite photos of my daughter (and her beloved teenage friend Sophie). Taken with my iPhone 3G, it's not a very good photo in lots of ways, but it captures a precious feeling, so I love it.

Technique is necessary not sufficient

‘Ah,’ you say, ‘But isn’t a technically perfect photograph of real feeling better than a shot of the same emotion that’s underexposed and has a tree growing out of the kid’s head?’.

The answer of course is yes. Which is why it’s worth studying all you can and building up some solid technique if you’re photographing your own children.

It’s also why you might hire a professional photographer to take the shots of your child – they should be better at getting the kids to be themselves in the less than normal situation of a photo session.

They should also be better at picking the moments to capture the real emotion. And they should also be better at composing the image and getting it technically perfect (in camera and with their post processing and printing).

What you’re also getting with a pro is (one would hope) something of their personal vision – their take on childhood.

Altogether, that’s a pretty rare and expensively acquired skillset, so you’ll have to be prepared to pay for the pro’s ability and time.

But if you’re looking through galleries of photographs (your own or someone else’s)  and you see photographs of kids that look great when you squint but don’t really deliver much impact when you really look closely, the chances are what’s missing is that genuine emotion.

And capturing that is something that should work on yourself if you’re interested in making great images of children (or anybody, for that matter).

Like I said, feeling is everything.

Categories
Children's portraits Tips/Tutorials

Tips for Photographing Children’s Parties

Make sure to shoot the key moments. (Canon 5D. EF 85mm f/1.8 lens at f/2.2. ISO 1600 1/250 sec -2/3 EV)

Parties would seem to be a great opportunity to take photographs of your children having fun. And it’s an event you want to capture for posterity – especially if it’s a birthday or other special occasion.

But capturing good images can be more difficult than you’d think. Fast-moving cake-fuelled children, indifferent light and lots of visual clutter all offer challenges.

Here are some tips for getting the most out of a children’s party

1) Don’t shoot from your normal height

Getting down to eye level with the children often produces better results than shooting down on them from the normal parent-view height. The pictures are more involving and you don’t just see the tops of little heads.

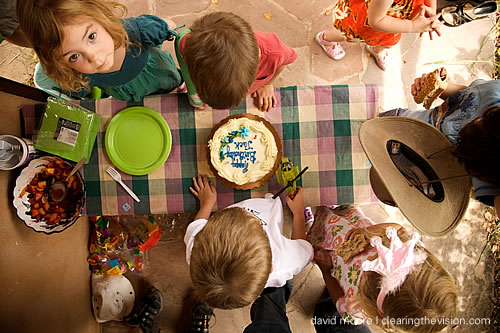
Alternatively, shooting from directly above, or way down low can also produce some interesting results

Changing the angle can produce an interesting version of a classic party event.

2) Mix up the type of shots

I mainly shoot candid shots of the children with a reasonably long lens (most often a prime 85mm f/1.8 on a full-frame camera), but even with a single prime lens it’s worth looking for a range of shots.

The cake, the pile of presents and other details will help set the scene, as will wider shots of the room and bunches of kids.

The key is to imagine you’re telling the story of the party through your series of photographs – what images would you need to explain it someone who wasn’t there?

Don't forget to shoot some details that help tell the story of the party.

You can often get some of the details before too many people arrive, when you’ve got more time. Before and after shots of the scene of the party can also work well – especially if there’s a piñata and lots of wrapping paper involved.

3) Remember whose party it is

Especially if it’s your own child’s party, don’t forget that they’re the ones who should have the most attention paid to them photographically. I speak from hard experience on this one. At one of my daughter’s birthday parties I took roughly an equal amount of photographs of everyone there, just shooting whatever appealed to me.

As it turned out, not many of the shots of my daughter turned out to be that great, which was unfortunate but also ridiculous on my part – whatever else you photograph, make sure you have plenty of good shots of the child whose party it is.

4) Shoot the key moments

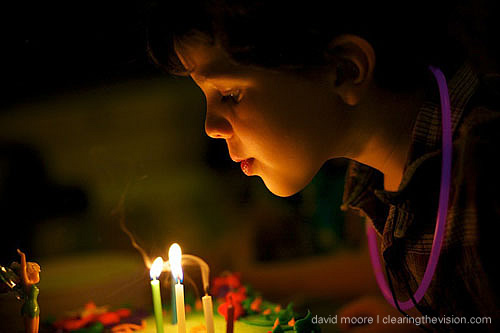
You’ll probably spend most of your time getting candid shots of everyone enjoying themselves, but there will also be some must-have moments, like the birthday boy blowing out the candles, or the attacks on the defenceless piñata. If it’s not your party, check with the hosts about what’s planned so you don’t miss the important elements.

A note on the candle blowing photograph. This can be tricky to capture well, and you can’t really ask for a re-shoot. So here’s how I try and approach it.

  • make sure your flash is off if you have one, so the face is lit by the lovely warm candle light (the brighter the ambient light in the room, the less you’ll see the light of the candle, though)
  • I use exposure compensation to underexpose by -2/3 or so, which will darken the shot a little, creating a bit more drama and emphasis on the face
  • if you’re shooting indoors and it’s not very bright, watch that you’re not choosing an aperture that will result in too narrow a depth of field, unless that’s what you intend. If you’re in close at f/2, what’s in focus is likely to a very thin sliver (probably not both candle and face if you’re shooting head-on)
  • burst mode (if you’re camera has it) will give you the best chance of getting a good shot of the moment the candle is blown out. Sometimes kids can look a little odd as they puff out their cheeks and blow, so having lots of images to choose from can help
  • kids all tend to gather round the cake with wide eyes, so if there’s time a wider shot of all the friends staring can be worth it, too

5) Party etiquette

If it’s your party, then shoot away, but if it’s someone else’s then you should check with the hosts that it’s OK (often they’ll be delighted that there’s a keen photographer taking pictures – make sure to share them, though). This is especially important if there are friends of friends there that don’t know you – even if the hosts are happy for you to shoot, be aware and sensitive to particular parents’ wishes if they’re not keen on you photographing their child.

You should also make sure to be respectful and friendly to the kids – they’re at the party to enjoy themselves not to follow instructions from grown-ups they might not know that well. So let them do their thing without intervening, or introduce yourself and make taking photographs part of the fun – showing them the results of their antics on the back of the camera for example.

6) Technical issues

Especially in the summer, there can be a lot of indoor/outdoor mixing at parties, so make sure you change your ISO and other settings to reflect the different lighting conditions. In these situations I often leave the camera in Auto White Balance mode and make any necessary white balance adjustments later (I shoot RAW, though, so if you shoot jpgs you’ll have less lee-way on this).

I tend to shoot in Aperture Priority mode, which gives me quick control of depth of field as I make decisions about what sort of images I want. But I’m always checking the shutter speed is fast enough to freeze the motion of the fast kids (unless I’m deliberately going for some motion blur). I tend not to use flash at all, but if I were to use it I’d employ a diffuser and/or bounce the flash to avoid it overpowering the scene.

A tripod would just get in the way, and won’t freeze motion anyway, so leave it at home and handhold. As mentioned above, burst mode will give you more options of capturing a crucial scene successfully.

Conclusion

The main point of party is to have fun, so unless you’re on the clock while you’re shooting, remember that first of all you should be enjoying yourself. But I hope these tips will leave you with some memorable party photographs to help you remember what a good time you and the guests had.

I’d love to hear your suggestions and tips for taking better party photographs – feel free to share them in the comments below.

Categories
Children's portraits Tips/Tutorials

Learn your craft then forget it

One of my wife’s teachers in architecture school wisely told his charges, ‘The bird of inspiration is not going to take a dump on your paper in the shape of your design.’

He was arguing that you have to put yourself in a position for inspiration to strike. Be at your desk with your skills and techniques honed, working away at stuff. Then you might get ‘lucky’.

The necessity of learning your craft is undeniable, and while I’m not pretending I’ve got anywhere near mastering it, I’m learning and I try to pass on tips and suggestions here that will help others. As my tagline says, I’m committed to ‘better children’s photographs for everyone’.

But for most types of photography – and definitely if you’re photographing children – you need both to learn your craft and then be able forget about in some ways while you’re shooting. If you take a photo with a 1/100 second shutter speed, even within that single second you had a 99% chance of not getting the particular shot you did. It’s amazing we get anything half-decent at all.

So when I’m shooting, I’m trying to think rationally about my backgrounds or composition. But most often I don’t have time. I trust that somewhere in my head there’s a bit of me that’s assessing what would make a good shot, moving my feet to get a new position that cuts out something distracting or brings more light into the eyes. But sometimes if you have to think about it, you’re taking too long.

So I’ll set the camera up (almost always on Aperture Priority, pretty close to wide open – say f/2.2) and then don’t worry about thoughtfully composing a technically perfect shot. Instead, what I’m looking for is emotion, because that’s what powers a lot of my photographs, and it’s easier to assess that quickly.

The most technically proficient shot is meaningless if it doesn’t communicate something – all that craft has to be in the service of something more important.

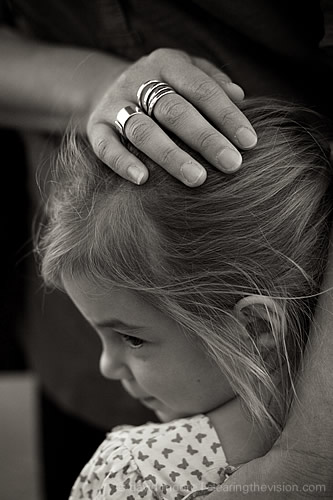
The image above shows what I mean. I took it at one of my daughter’s friend’s birthday parties. (Even when no-one’s paying me, I’ll be the one taking photos of kids I know.)

My daughter Fionnuala loves her kindergarten teacher Naomi with an intensity that’s wonderful to see (Naomi also taught her last year, so this is a long-term relationship). I was talking to Naomi when Fionnuala came up and snuggled into her. Instinctively, Naomi put her hand on Fionnuala’s head, and seeing that, I pulled the camera up to my face and got this shot.

What I saw was a sweet personal moment, but also a more universal image of nurturing and love in Fionnuala’s dreamy expression and the affection communicated in Naomi’s protective gesture .

At the time of course I wasn’t thinking this at a level I could express in words – I was probably thinking something more like ‘Ahh, there’s something there, where’s my camera!’.

The black and white treatment seemed to simplify things further, and I’m very happy with the way it turned out.

In fact, it only works well on a universal level because it has a personal truth to it. Writers are often told to write what they know because the more specific they get, the more (counterintuitively) what they’re saying has universal currency.

So if you’re a parent looking to take better photos learn your craft, and then have it in the background while you tell stories that are unique to you and your family.

If you’ve got stories to tell about what you’re thinking about while you’re shooting, I’d love to hear them.

Categories
Photoshelter Tips/Tutorials

Backup Strategies for your Photographs

When we shot on film we didn’t have much of a backup strategy. Amateur photographers would get the prints back from the lab, and store the negatives with the prints, the more hardworking of us putting at least some of the prints in albums. We didn’t keep extra copies of the images (except the dupes we’d send to family), and probably didn’t offer much protection beyond some envelopes and a cardboard box.

But now we’re shooting digital we have many more options on how to preserve and protect our valuable files. Here’s my approach, which I use both for client work and for my own projects.

The basic idea is that I never have only one copy of anything, and the multiple copies are in multiple locations. That way I’m protected against drive failure, my own stupidity (deleting files I don’t want to), and physical catastrophe (fire, flood, theft, and the like.

Even though file sizes keep getting bigger, the cost of external storage is so low now – 500GB for $70 or so here in the US – there’s no excuse for not backing up your stuff.

1) Get the image off the card as quickly as possible

In some ways, the most vulnerable time for your images is as soon as you’ve shot them. Memory cards are pretty reliable, but not as dependable as hard drives, and with a very few exceptions, cameras don’t create automatic duplicates of the images on multiple cards. So get them onto a computer as quickly as possible.

2) Backup the images before you do anything else

It’s tempting to start sorting and adjusting the images immediately, but try and get into the habit of creating a backup of the originals before you do anything else.

I use Apple Aperture which has a straightforward backup system using Vaults which makes this easy (I’ll not go into details here, but for those familiar with Aperture, I use managed not referenced Masters, with a number of different libraries for different types of work). However you do it, make sure you’ve got safe copies of your original files.

Even though programs like Aperture and Adobe Lightroom don’t make changes to the original files as you make adjustments, duplicating the originals gives you some peace of mind. This backup should be on a different drive from the first version – having two copies of your images on the same failed drive won’t do you much good.

3) Offsite backup

Keeping your backup drive next to your computer is convenient, but if you’re robbed or the house burns down, then you’ve lost both copies. It can be a pain, but it’s crucial that at least one of your backups is offsite. You could maybe swap drives with a friend for safe keeping.

I keep one of my backup drives in the office, with the other at home (and the main drive containing my libraries travelling with my laptop.)

That way even when I’m working on files and two of the drives are together (at home or at work), there’s always a third in another location.

4) Drobos and RAID arrays

As well as individual hard drives, there are options using mirrored drives, where the same information is automatically written to two drives. Therefore if one drive fails, you can continue working as if it never happened.

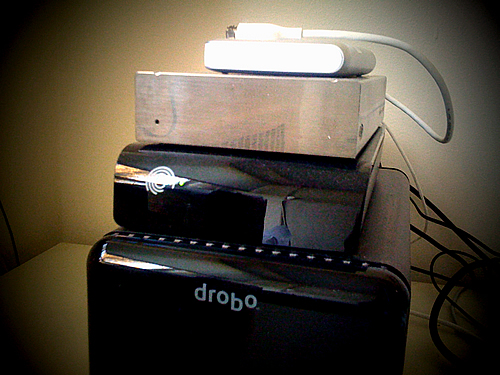
A Drobo is an easy to use system that does much the same thing as a traditional RAID 1 array (which can be trickier to use). One of my Vaults is on a Drobo in the office, so the same information is actually stored on four drives (1 main, 1 portable vault, and another vault mirrored on 2 drives on the Drobo).

But you should never have all your information just on a Drobo or RAID 1 array – you’re more protected from disk failure with such a system, but no more protected against someone walking away with the whole device.

5) A note on drives

For photograph and other backups, I’ve used a bunch of drives over the years. And yes, they do fail. The only drives that have failed on me, however, have been ones from LaCie. Maybe that’s just coincidence.

For external portable drives I mainly use ones from Otherworld Computing. For what’s it worth, when I did my Aperture 2 training course the instructor (who also worked with video a lot, so was storing a ridiculous amount of data) recommended Seagate or Hitachi drives, and didn’t have many good things to say about Western Digital.

6) Online options

As physical disk space has become very cheap, so the options for online storage have increased. Services like Dropbox, JungleDisk or Mozy allow you to store your images in the cloud.

Photography-specific services like Smugmug, Photoshelter (or even a Pro Flickr account) offer safe storage with lots of extra useful features such as web-accessible galleries.

Upload time for lots of files will be slow, and your backup is only safe as long as the company stays in business. For these reasons I wouldn’t use it for my only backup, but it’s a handy belt and braces approach.

7) Backing up finished files

This is something I’m not great at. One of the joys of using Aperture or Lightroom is that you don’t have multiple files that represent each photograph in different stages of editing. So there’s no fighting your way through nested folders to look for the original file, the square crop, the black and white, the cross-processed one or the lo-res web version. You can have all these versions, but there’s only ever one file, with sets saved in the program’s database with the settings for all the different versions.

That means the finished files don’t really exist until I export and send them to someone. Often I’ll not even keep those files because I figure I already have them in my (super backed-up) library.

But if every Macintosh computer in the world disappeared overnight, taking every copy of Aperture with it, I’d be in trouble (see where your thoughts can end up when you start thinking about backup options). What I should do is output TIFF or high-res JPG versions of all the files I’ve adjusted.

Burning these to DVD (or dumping them on another hard drive) would ensure that I wouldn’t have to recreate all those adjustments that took me so long.

Conclusion

These are by no means the only way to store your stuff safely, and I’m sure there are other things I could and should be doing. But this is my backup strategy, and it’s one that allows me to sleep at night. Not sure what I should do with all the film prints and negs we still have kicking around, though.

If you’ve any comments or suggestions, feel free to share them below.

Categories
Children's portraits News Tips/Tutorials

Guest Post on DPS: 6 Steps to Take ‘Guerilla’ Photos of your Children

I’m very happy to say that this week’s post of tips and advice has reached a wider audience than my regular ones.

My guest post for the great Digital Photography School is now up: “6 Steps to Take ‘Guerilla’ Photos of your Children

It looks at how sometimes the best photos of your kids come from a casual approach and having the camera handy

 Guerilla Photos of your Children 1.jpg

Check it out over there, and thanks to the DPS folks for publishing my post.

Categories
Children's portraits Tips/Tutorials

How to Shoot Portraits in Harsh Light

Up here in the high desert of New Mexico we have beautiful but very strong light. This can be great for creating dramatically contrasty shots, but not so good for taking flattering portraits of people.

Camera sensors find it hard to capture the full dynamic range of both the fully-lit areas and those parts of the image in shadow. So the highlights can be blown out to white, and the shadows full black – neither containing any detail.  This can lead to foreheads being bright white and the eyes being in black shadow.

Bright light also makes children squint and sweat – not that attractive.

With all this in mind, when I’m organising portrait sessions for clients, I try to schedule them early in the morning or later in the afternoon.

But in real life we do things during the mid-day hours. I was recently at a birthday party for a friend of my daughter. The party was held at an outdoor swimming pool around lunchtime. The food and cake were laid out on a light-colored concrete deck –  there was almost no shade.

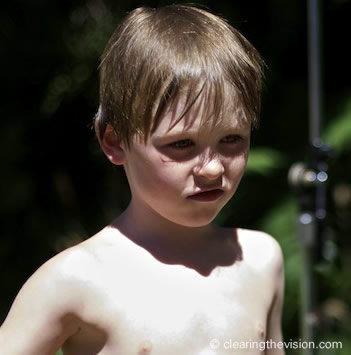
The problem with harsh light: blown highlights on the poor kid's nose and across his shoulders, and the tell-tale raccoon eyes in shadow.

From a photography perspective, it was brutal, but the kids were running around having a good time and there were some nice images to capture.

So here are some tips for shooting in harsh light.

1) Find some shade

The softer more diffuse light you find in the shade is much better for photographs. And if your subjects are looking out towards brighter areas, there’s a good chance you’ll get flattering catchlights in their eyes.

Here's a much happier kid in the shade, with much more even lighting and catchlights in his eyes

2) Get in tight

Even if your subject’s in the shade, there might be some sunlit areas in the background, which will cause distractingly bright blown out spots. Getting in tight – zooming in so your subject fills the frame  will reduce the chances of that.

And if your subject is in the sun, getting in tight will help the camera expose for just what’s important in the shot.

3) Use the backlight

Backlit poses work well to frame the subject with some flattering light.

A subject lit with strong sun from behind might well be pretty well lit from the front with the ambient light from the bright day. If you keep the subject between the yourself and the sun, the sun will act as a rim light, helping to separate the subject from the background and lending a pleasing halo-like effect.

The other benefit of having the sun behind the subject is that they won’t be squinting as they stare right into it.

Your subject might well be underexposed in the scenario, so you can either adjust for exposure on site, and/or fix in it post (especially if you’re shooting RAW) – often a levels adjustment will help, too.

4) Use fill flash or a reflector

To be honest, I almost never do this (from laziness not for any better reason), but using a fill flash will remove some of the racoon-eye shadows you can get on bright days.

You can also use a reflector to bounce some light up into faces. This can be a formal photographic reflector if you have one handy, or you can improvise with some white paper or the like. Sometimes the scene you’re shooting includes its own natural reflector, for example if a child is drawing and leaning close to the paper.

The fill-in flash and wide angle lend this shot a slightly surreal feel, enhanced by the lomo-style processing.

5) Filter the light

This is more of a pro technique than something you’ll be able to find on the fly, but filtering the light using a white translucent photo umbrella or a big diffusion panel (like these from PhotoFlex) takes the edge of the brightness. Some wedding photographers travel with their own white tent that they’ll use if they’re stuck for some good shade.

6) A Neutral Density Filter

If (like me) you tend to shoot as open as possible to blur the background, then the brightest days can create real troubles. Even at the lowest ISO, your fast glass might just be letting in too much light even at the fastest shutter speed you’ve got. To get down to f/2.8 or thereabouts to give you the narrow depth of field you’re after, you can use a neutral density (ND) filter – essentially sunglasses for your lens. The filter blocks a proportion of the light from entering the lens, but won’t change the colour temperature of the light that does get through.

(Landscape photographers use a graduated neutral density filters which reduce the light only from the top half of the filter. These work well at balancing out a bright sky and darker foreground, but they’re less useful for portrait shooters who need things a little less regular).

I hope these tips will give you some options when you find yourself at a high-noon shoot-out. And let me know if you’ve got any other good suggestions.

Categories
Children's portraits Santa Fe Tips/Tutorials

The Pet Parade – working with children and animals

It’s Fiestas time in Santa Fe, one of the highlights of which is the  Desfile de los Ninos, also known as the Pet Parade. Originally an occasion for children to bring their pets to be blessed by the priest, it’s broadened into a relaxed and funky parade including high school bands in fancy dress, chickens in cages, some amazing costumes and still a large number of children and pets (including this year chickens, rabbits, cockatoos, ferrets, cats and lots of dogs).

Shooting a parade like this sounds as if it would be easy with all the great spectacles on offer, but it can actually be tricky. The first problem is that you can’t move around too much – I had my spot on the side of the parade route and that was about it. So choose wisely and watch the direction of the sun – I was almost shooting straight into it today, which wasn’t ideal (but I was right outside the door to our office, so at least I had hot coffee).

Another problem is that there’s likely to be a lot of visual clutter. Your naked eye filters out the messy background when you see a cute dog dressed up like a cowboy, but the camera will also show the random feet and the white line on the street that your eye glossed over. The other people in the parade (and the other people watching it from across the street) make it hard to get clean shots (especially if you can’t move around to edit them out). You can shoot wide open (in other words with a lowest number aperture your lens can deliver) to create a narrow depth of field, blurring the background, but this brings up another problem – lens choice:

Sometimes you want an wide-ish establishing shot – to show a whole group of folks as they approach, for example. Other times, it’s the little details that stand out. This mixture is a good approach, but that calls for a range of maybe 28mm – 200mm or more on a full frame camera (around 18mm – 130mm on a crop sensor). That’s a big ask of any single lens especially if you want some good sharpness wide open.

In other years I’ve swapped between my 24-105mm f/4L and 70-200mm f/4L on one body, but that’s a bit of a pain, so this year I cheated and used two camera bodies, putting the 70-200mm on my old backup Rebel XT and keeping the 24-105mm on my 5D. The downside was that I looked like a newspaper shooter, but the upside was that I had the equivalent of a full-frame range of 24-320mm at my disposal.

I wasn’t trying hard to capture decent shots of every group that passed, just photograph the things that grabbed me the most.

Here’s a selection from this year’s parade, with a few from earlier years thrown in for good measure.

Categories
Strobist Tips/Tutorials

Finally got my Strobe on

Illuminated cat

It took longer than I’d planned, but I’m now fully set up for some off-camera lighting adventures.

Some AlienBee triggers (the CST and CSRB, if you’re interested) and one of the Starving Student kits from Midwest Photo Exchange saw me right, and while I’m definitely a newbie at this, it turns out that some of what I’d already read made sense when I started to practice yesterday.

My aim (at least at first) with the strobism is to use it to make it look like I haven’t really used artificial light – a simple one light set up, working to support natural light.

My daughter Fionnuala was happy to help out as a model (so long as she got to take some pictures too). And I found another willing model – our loco cat Colin Feral.

Both of these shots have natural light coming from one side, balanced with the flash (through an umbrella) on the other side.

Strobist experiment

I can definitely see how this will be useful in some of the more challenging interior locations I find myself in (and outdoors, too I’m sure).

Categories
Tips/Tutorials

Seven tips to take better kids’ photos – no matter what camera you have

Getting down to their level invites you into the kid's world.

I’m always pleased if you hire me to photograph your children, but most people don’t live in Santa Fe or Albuquerque, and based on the ‘teach a man to fish’ theory I’m keen to share what I’ve learned with as many people as possible

I think everyone can take better pictures of their kids, regardless of the camera they have or their experience.

So here is the first in a series of tips for taking better photographs of children.

None of these first tips require adjusting your camera’s settings in any way except zooming in and out.

I’ll get to more technical tips later, but often the biggest improvements come from taking a more thoughtful approach to what you’re photographing.

And that won’t cost you a penny in new gear.

1) What are you trying to say?

As the photographer and writer David du Chemin points out, a good photograph isn’t just a picture of something, it’s a picture about something. This might sound like splitting hairs, but bearing this in mind is the single biggest thing that will improve your photographs. You can have all the technical craft in the world, unless you know what you’re trying to capture and communicate then your photos won’t have much to say.

Which is why I don’t like formally posed shots very much because arranging people in a pattern and making them smile often only says ‘they made us smile, and look how awkward we are’.

You know your own children better than anyone. What is it about them that you find fascinating or that melts your heart? What is it in their character makes them you, and how do you feel about that? It could be as simple as wanting to show how beautiful you think they are, or how funny. Or you might love the serious concentration they devote to their painting. Whatever it is, that’s a good place to start. Imagine you were a photojournalist given the job of producing a set of images that showed some key aspects of your child – what are the activities, moods or emotions you’d like to communicate?

Categories
Aperture Tips/Tutorials

Aperture 3 upgrade problems and fixes

UPDATE MARCH 2010: the release of the Aperture 3.0.1 update seems to have fixed many of the reliability problems. I’m back running in 64-bit mode with Faces working, and things haven’t crashed horribly for a while. YMMV.

After a long wait for the release of Aperture 3, I ignored my own rule about waiting until the first incremental update of new software before installing it. Big mistake.

Upgrading my 20,000 image library meant I fell foul of the apparent memory leak problem that seems to beset the new version.

First I was told I hadn’t enough room on my HD to complete the update – it had filled the spare 35GB on my MacBook Pro internal drive with a giant swap file.

Then the whole machine would hang while Aperture 3 performed some mystery ‘processing’ work on my images. I had no idea if my library was intact, and no way of actually using the product for real work.

The Fix – sort of

Thanks to the useful advice from fellow sufferers on the Apple Aperture Support forums, I binned my first attempt, and cobbled together a solution. I’ve no idea if these will work for you, and hopefully there’ll be an update along soon that will help us all out, but here’s what got me working again.