Categories
Tips/Tutorials

The benefits (and downsides) of shooting film

Shooting film seems to be enjoying something of a renaissance, especially among young people of the hipster persuasion. Loyal readers will remember a recent blog post where I promised to dig out the old film camera my Dad had given me more than 20 years ago. I did, and here’s what I learned (or relearned) about the joys and frustrations of shooting film.

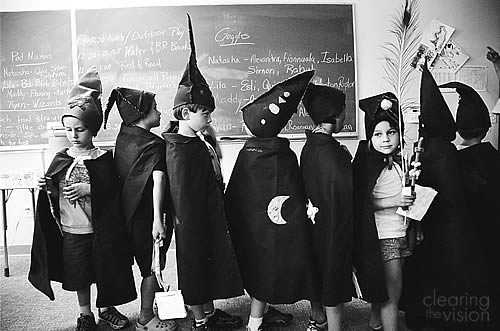
Note that this is based on running a roll of Ilford XP2 through a (not very good even at the time) Canon 1000, photographing a kids’ summer camp presentation – depending on what you shoot and with what film camera, you might end up with very different results.

1) Film still looks gorgeous

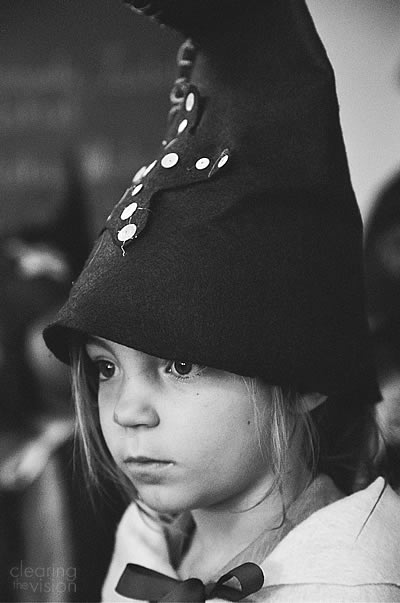
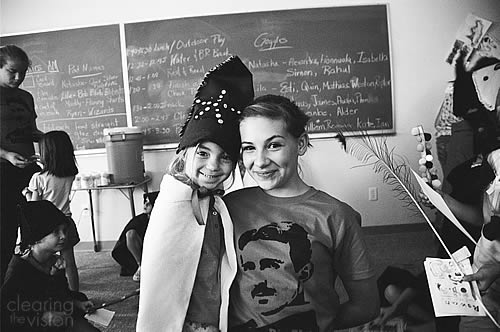
Partly thanks to the great developing and printing from the Camera Shop of Santa Fe (although they’re not cheap), the images came out looking contrasty and very attractive. I shot in black and white, and the skin tones were smooth and there was a nice touch of grain in the shadows.

You could probably fuss in Aperture or Lightroom to get the same sort of results from shooting digital, but this saved me all that effort, and the prints had that indescribable film quality. Sometimes there’s something a little too squeaky clean about the technically perfect files DSLRs put out today.

In fact while you might be able to get the same effect processing digitally, what’s interesting is that I probably wouldn’t have gone as far with the processing if I were doing it. There’s a lot of solid black in them, which I would have shied away from, trying to keep some of that shadow detail. Just goes to show there’s no such thing a perfect histogram, just good images.
2) You pick your shots more carefully

It’s true that firing off a load of shots on a DSLR can yield some great results that you just couldn’t get any other way – especially in sports photography, for example. But sometimes the ‘spray and pray’ approach is just replacing thoughtfulness with a numbers game. Rather than slowing down and choosing your moment carefully, you just shoot a ton in the hope that you’ll get something good.

When you’re paying more than 50c each time you press the shutter (and swapping rolls is a bit of a pain), you’re definitely less trigger happy.

I normally reckon on a 25% selects rate when I’m shooting digital – in other words of fifty images I make, around 12 of them I’ll like well enough to do some processing work on and/or show to the client if it’s a paying job.

With my roll of 36, I’d say I was happy with at least two-thirds of them. A good lesson in slowing down and being more careful.
3) It’s still a pain in the behind

Friends wanted some of these photos from the camp. So I had to get the film developed (with extra CD of digital files because I don’t have a scanner or the time to scan the files) pronto. We’re so blasé about shooting digital and being able to have the results across the world in minutes that we forget how amazing it is.

And there’s no bumping up the ISO because you’ve moved inside or it’s getting dark. And knowing that you’ve only 36 frames before you have to swap rolls is always praying on your mind. That and the fact that you can’t see what you’ve got until potentially days later – no chimping here, of course.

4) Digital’s sort of cheap

While it costs to develop a roll of film in a way it doesn’t for the same number of digital shots, there’s an interesting side argument here. A pro-grade film body such as the Canon EOS 1N can be picked up on eBay for less than $300. A new 5d Mark II is around $2500. I know it’s not comparing like with like, but you could buy and develop a lot of film for the difference for $2200, and you wouldn’t need to upgrade in another three years.

The cost of clicking a shutter on a digital camera appears cheap, because it’s free at the point of use, but the total cost of ownership starts to look a lot more expensive when you factor in the actual costs.

Worth the effort

I was pleased with the images I took and enjoyed the experience of shooting film again. It’s worth doing even if you end up concluding how glad you are you never have to shoot film any more. But for me it was more rewarding than that, making me think about how I shoot, and also reminding me how good film can look.

I’m not saying I’m going back to shooting film exclusively, or even very often. But throwing a decent film body in the bag when the conditions are right – outside daytime portrait session for example – might not be a bad idea.


Categories
Children's portraits Tips/Tutorials

Imagine you’re talking to a friend – how to tell a story in your photos

In one of my other lives, I’m a journalist and writer. I used to write for The Irish Times in Dublin, I’ve published a book of travel writing (it’s a lasting regret that it has no photographs in it, but at the time I was taking rubbish photos), and I now write for New Mexico Magazine and other places at times. (I outlined what I learned about photography from being a writer here).

I’m storyteller when I’m stringing words together. And I’m increasingly realizing, they key to good images (at least of the style I prefer) is to be a good storyteller when you’ve got a camera in your hand.

A good picture, or a set of pictures, tells a story. Images can be beautifully lit and technically perfect, but if they doesn’t say something, then what’s the point?

Everything in the image needs to contribute to the narrative you intend. Sometimes what you’re trying to say is simple – this is a happy girl – but for more complicated events, it’s worth having a think about how best to get your message across: what to include and what to leave out.

Imagine you’re talking to a friend

Ashley Biggers, my talented editor at New Mexico Magazine recently made a suggestion about a travel piece I’m writing for her, which is also appropriate to making images at an event or portrait session:

‘Imagine you’re excitedly telling your friend about the best parts of your visit. What would you say?’

This gets to the heart of the matter – you wouldn’t start at the beginning and give equal importance to every last thing you did (‘First I drove there, then I parked the car, then I put on my coat . . . ‘), but you also wouldn’t spend all your time talking about one aspect of the event.

So in photography terms, you wouldn’t photograph everything, or only take lots of the same sort of photographs.

Some things are just more important than other things, and you’ll get excited over some things and not others – so keep asking yourself what those key things are and make sure you show them clearly.

Telling the story of a party

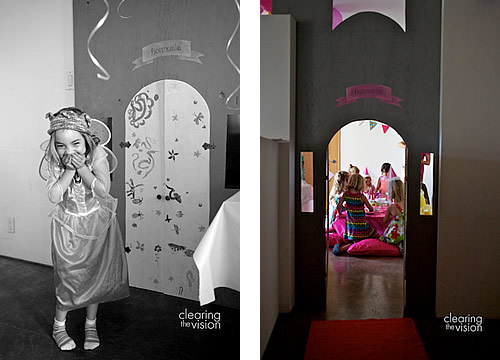
Our daughter had her sixth birthday recently, and chose a princess theme for party (naturally).

My wife had spent a lot of time and effort preparing the room for the party, going so far as to build a castle facade with working doors (she’s an architect).

As I photographed the event,  I wanted to make sure I set the scene with the images, as well capturing the key events.

When we look back in years to come, some of what we’ll want to recall will be the way the whole thing looked, not just tight shots of our daughter.

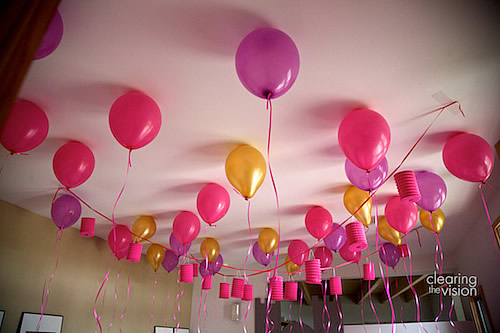
So if I’m telling you about what the party was like, I’d start with ‘The room looked amazing. We had tons of balloons all over the ceiling.’ (as you can see from the photograph at the top of this story)

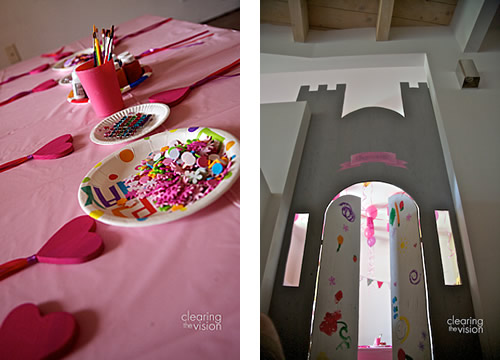
‘There were princess sceptres to decorate. And Miss F’s mum made a fabulous castle facade with working doors and ramparts and stuff.’

‘Each time a new guest arrived, Miss F closed the door and then got really excited when they knocked and asked to come in. And all the princesses looked so cute sitting down at the table in their ‘castle’.’

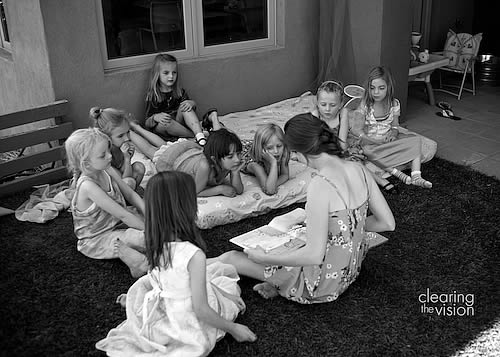
‘They went outside and our older friend read them princess stories.’

If the photographs do their job, then the text descriptions are unnecessary – and the images add some details and visual appeal that the words don’t contain.

I have the obligatory photographs of my daughter blowing out the candles as well, but some of these wider shots (all taken with a 35mm lens) tell a more complete story of the day.

So don’t be afraid to shoot wide, and imagine you’re talking to someone about the highpoints of the event you’re photographing.

Categories
Children's portraits Santa Fe Tips/Tutorials

It’s Showtime – tips for shooting a ballet performance

Recently I took photographs at my daughter’s ballet class, and really enjoyed the experience.

So when I arranged to take photographs of her class’ dress rehearsal and performance, I was looking forward to it immensely, but it threw up a new set of challenges that I had to deal with.

The practice studio had been bright, spacious and very easy to shoot in. I could follow the girls around, changing my point of view to get the light I wanted or minimize some background clutter.

The location for the performance on the other hand (the theatre of the Scottish Rite Temple in Santa Fe) was dark and cramped (at least around the stage).

Gorgeous and fascinating. no doubt, but dark and I couldn’t move around at all.

At least for the dress rehearsal, I was able to squat down just off the stage, but that’s where all the girls from the other classes were waiting, so it was all a bit tight.

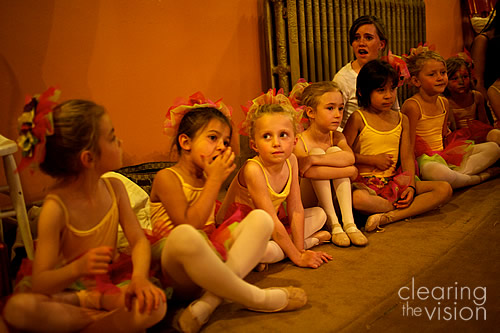
Allegra Lillard, the amazing Director of Dance for Joy, kept everything moving smoothly and energetically, but like any dress rehearsal there was some waiting around.

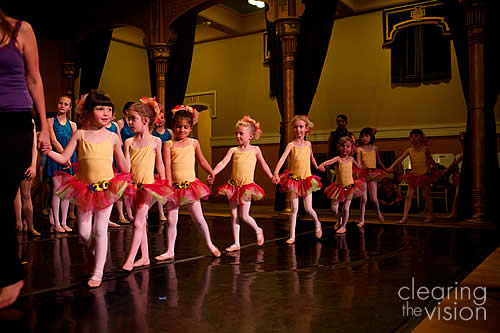
Even sitting up against a wall waiting for their turn, there’s something hugely endearing about little girls in full ballet outfits. My daughter’s class were models of patience until it was time to practice the grand finale – the first time they’d been up on stage with all the other (older) classes.

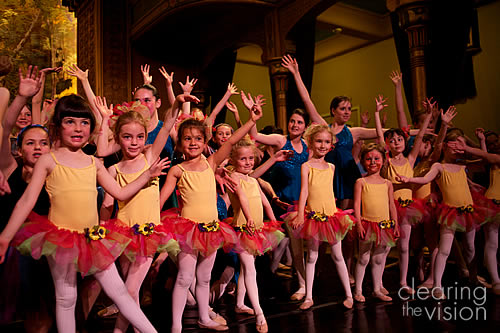
They were a little nervous going on to the stage, but soon reveled in their place in the limelight.

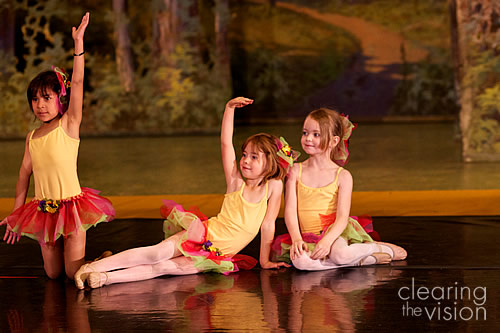
Practicing their own number came next, and they ran through it like small seasoned professionals.

If the rehearsal was tricky, then getting shots on the day was going to be even harder.

The house lights would be down, so the gorgeous space was even darker, and I was confined to my seat in the fourth or fifth row.

But I brought the camera anyway, and hoped for the best – the rich warm stage set and lavish surroundings were too good to miss, when combined with little ballerinas.

The ratio of keepers to rejects wasn’t that great, but I was very happy with those I got.

Four tips for capturing ballet

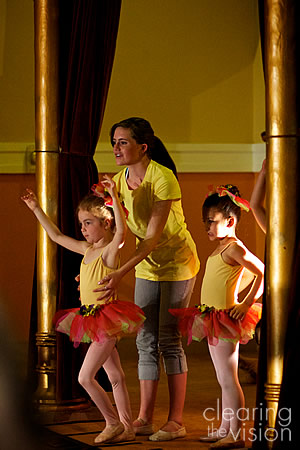
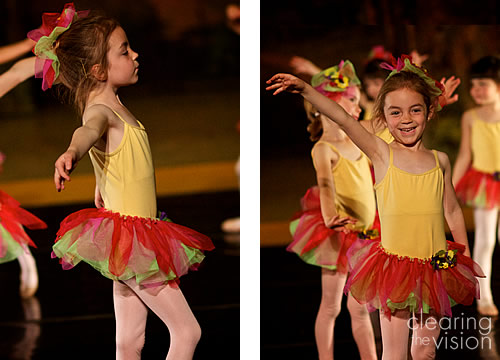
1) Choose your moment – in any performance, there are moments of stillness that are worth looking out for.The image above left captures a point when my daughter had momentarily struck a pose – it was the end of one gesture, just before the start of another move, and as such it has a strength that works well. It’s certainly possible to get a great shot in mid-twirl or run (and these would communicate more dynamism than poise), but it was the quieter moments that appealed to me (and they’re easier to get right, especially if the light’s dodgy).

2) Tell the whole story – With children, you want to tell the story of their whole experience, not just the performance. So the shots of waiting around, being ushered onto the stage, or their big smile afterwards at the curtain call are all as valuable as your images of their performance itself. With older children or adults, you might want to emphasize the performance itself (their technique or form,  or timing with the other dancers). But with younger kids, the imperfections of their performances make their personalities shine through.

3) Think both wide and narrow – It’s tempting to think you should just go with the longest lens you have, but you might miss some good compositions that way. I shot with my now-standard combination of two bodies, one with with a 35mm f/2 and one with an 85mm/f1.8 on the other.  It partly depends how far you are from the stage as to what your focal length options should be, but you’ll want to be able to capture most of the width of the stage for the shots of the whole group. You’ll also want enough length for picking out individual poses and expressions.

4) Keep the shutter speed as high as you can – to freeze the movement (unless you’re going for a nice deliberate blur to communicate movement), then you’ll want to keep the shutter speed above 1/100 at the slowest. Some of the above images were shot at around 1/100 sec f/2 or f/3 at ISO 1000, with the ISO being pushed up to 4000 for some of the performance  shots. I’ll take some digital noise on an otherwise sharp image than a noise-free shot of messy blur. So bump up the ISO and/or shoot as wide open as you can (i.e using a lower f-number to let in more light)

Categories
Children's portraits Tips/Tutorials

From pixels to products – Why you should print your photographs

If you’re a digital photographer, then you’ve likely got hard drives full of images. Some of them you’ve hardly looked at since they were imported, while others you’ve slaved over in processing, and shared widely online.

But until you’ve printed them out, your images haven’t lived a full life.

It’s been busy here over the last few weeks as I shot and printed the preschool class photos and ‘day in the life’ project images, as well as ballet rehearsal and performance images. Client orders came in, and got turned into boxes containing prints, books and other goodies.

It underlined to me how much I enjoy making the images I make real. Here are a few product ideas that went down well recently:

1) The Luxe Book

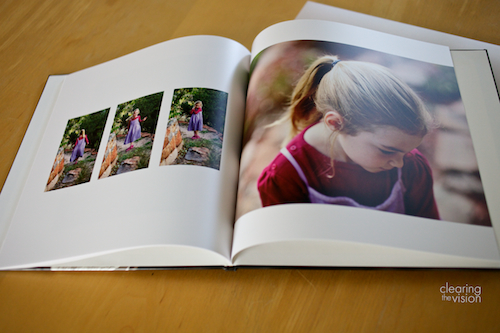
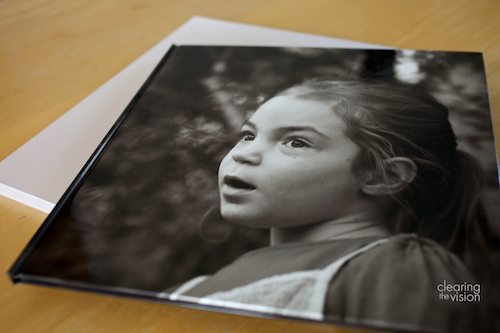
For me, a custom-designed high-end book-bound album is the ultimate way to the tell story of a child at a certain age, or an event or class, for that matter. We’re wired for stories, and the ordered collection of images creates a narrative that draws you in.

I use Japanese-produced books from asukabook.com that offer amazing print quality and feel great in the hand. Imagine the most beautiful fine art coffee-table book you’ve ever seen, and now imagine your family’s images in that book. Consumer-grade self-fulfilled books (from Blurb.com, for example) offer a great way to get images into print, but Asukabooks are something else again (and are only available through approved professional photographers and designers). If you’re in Santa Fe, give me a shout and I’ll be happy to show you one of our samples.

As objects that you’ll enjoy for a very long time I think they’re unmatched. They work really well for families who want a lasting record of their session but aren’t the type of folks to display large wall art (which seems to be a regional thing – I know it happens elsewhere, but people here don’t go for a large family group print to go above the fireplace).


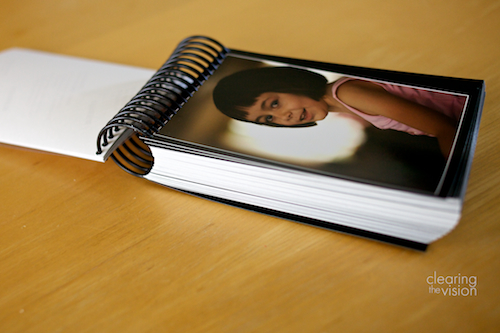
2) The Mini Accordion Book

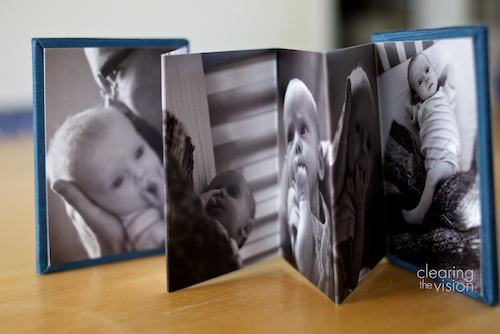
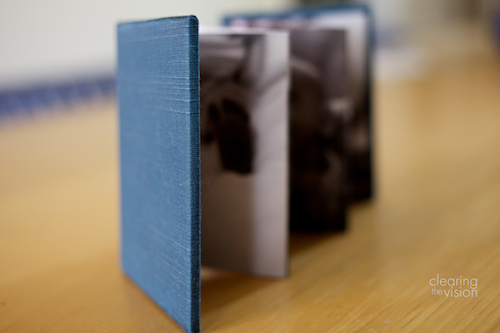
Wallet-sized prints are great for carrying around, or giving to other family members, but they’re easily scuffed or dog-eared. A nice solution to this portable gallery problem is the small fold-out concertina book. The ones we use offer an elegant matte finish to the paper, a choice of silk covers and little magnetic closure so they don’t open up in a handbag. Grandmas love them as small portable brag books.

We get ours from ProDPI.com (professionals only again, I’m afraid), who do an excellent job of the printing and putting together.


3) Coil Bound Books


Pros often use these as proof books to show clients all the images from a big event to help them decide which ones they’ll order larger or include in a custom-designed book. They’re regular 4 x 6s or similar sizes printed on pro-grade photo paper then punched and coil-bound. With one image per page (I like mine with a border) they’re quick and relatively inexpensive to produce. For the Gentle Nudge day in the life shoot and the ballet rehearsal shoot, I had a book printed up so the parents could flick through all of the images easily.

I hadn’t planned it, but I got some orders for the whole book. For a self-contained event, like a party, for example, they make a nice object. Not as formal or beautiful as a custom-designed and printed book, but nice nonetheless. Ours come from ProDPI, but Mpix.com and Shutterfly.com both offer something similar, and you don’t need to be a pro to buy from either of those.


4) Any size print

People seem to study physical prints in a way they don’t look at the same image on screen. I really enjoyed handing out the 8 x 10 class photos to some of the parents on the last day of school and watching them pore over the faces. Larger is better, but even it’s just a set of 4 x 6s, I really believe it’s worth getting prints made regularly.

But if you’re going to print them, promise me you won’t take a disk to the local Walgreens or Target (if you’re in the US – if you’re elsewhere then I’m sure you have similar neighborhood pharmacies or one-hour print shops). You’d be amazed how differently different labs will print the same image, and it’s worth spending a little extra to get something you’re going to be happy with.

I use a pro lab for most of my printing needs, but on the regular consumer side, I’ve had good results with Shutterfly and especially Mpix.com which a branch of a big pro printing lab, so you might want to give them a try. Smugmug the photo sharing site run by people I have a lot of time for recommend BayPhoto, so they’re another suggestion.


Whether it’s the high-end coffee-table book or an envelope of floppies, I’d urge you to free your images from the backlit screen one way or another.


Categories
Tips/Tutorials

Children’s shoots with two cameras at once

Gratuitous baby shot from a recent party to welcome Milana to our community. It was shot with (spoiler alert) my new camera, though.

I completely agree with David duChemin that gear is good, but vision is better. That said, here comes a partly gear-related post.

Regular readers will remember I recently had a clear out of some of my lenses that I wasn’t using regularly.

At the time, I thought my most likely purchase with the money would be a swish 35mm f/1.4 lens, but as I thought more about it, and picked up some more tips and ideas at the WPPI conference, a new plan emerged.

It was cemented after I did a recent baby shoot in quite a dark house (images to follow when the clients have seen them). The low-light capabilities of my old 5D were beginning to cause me problems.

Firstly, even when using the center focus point (which is almost always the only focus point I use) it would hunt for focus in low light. It was a bit of a problem when I did the Tumbledown party portraits, but even more of an issue this time. And the baby wasn’t exactly speeding around – had it been a fast 2-year-old, then I’d have been in even more trouble.

Secondly, when I reviewed the images afterwards, I wasn’t that happy with the noise generated at the high ISOs I’d had to employ. It would be fine for smaller prints, but larger ones would show it.

So I wanted a camera with better noise control at high ISOs, and more reliable focus. And I wanted to try shooting with two bodies at the same time, to minimize the time spent changing lenses. (Oh, and HD video was also something I wanted to play with.)

Throw in a great price I found for a Canon-refurbished body, everything was pointing towards a new body instead of a high-end lens.

Shooting with two cameras at once

So I’m now the proud owner of a Canon EOS 5D Mark II (which means Canon will be announcing the 5D Mark III any day now), and one of the first things I wanted to try was shooting with both it and my old 5D at the same time (light conditions permitting).

Instead of the 35mm f/1.4 for $1400, I’d also picked up the Canon EF 35mm f/2 for around $300 (although Amazon are currently showing it as much more expensive – perhaps due to the disaster in Japan?), and so with my daughter as my willing test subject I took some shots at home before we went exploring through the arroyo and hillside across from our house.

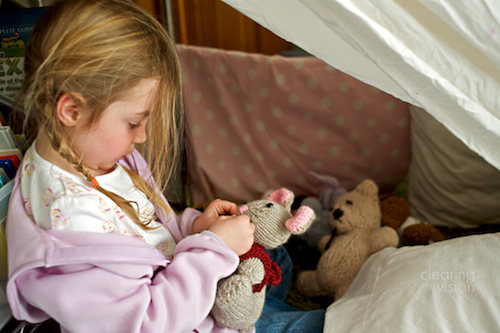
The 35mm shows the situation - a girl in an improvised tent
The 85mm shows the tender moment - the girl and her knitted mouse.

The 35mm f/2 was on the 5D and the 85mm f/1.8 on the 5D II.

The idea is that you can tell a wider range of stories with both the wide angle lens and the classic portrait lens at your disposal more or less instantly with no lens swapping.

This, while still getting the prime lens image quality and being able to shoot at the kind of apertures that primes offer that zooms don’t – ie. under f/2.8.

I really liked the flexibility it gives me, while still making me thing about how I’m composing the shot, and what I’m trying to say with each image.

It’s obviously not quite as quick as just sticking a zoom on one camera body, but I welcome the constraints and love the image quality I can get while still being flexible.

Next steps for the two-camera approach

Using two cameras, you can prepare for all sorts of situations with by choosing different lens combinations.

Again the 35mm shows the girl in her context (while still getting some background blur)

Press photographers often go with a medium zoom (say 24-70mm) on one body and and a longer zoom (say 70-200mm) on the other, to give them instant access to a really wide range of focal lengths.


The 35mm and 85mm setup would be good for weddings and other events as well as the environmental portraits I was doing here. Or stepping it up to a 50mm and a 135mm for sports work could yield good results too.

Having two large cameras hanging off you isn’t very discrete, and I’d only really do it if I was somewhere specifically for the purpose of taking photographs – it’s not a casual set up.

But I’m happy with the way it worked out, and looking forward to adding it to my arsenal on a real shoot.

Grab the 85mm, and you get the quick portrait when the moment's right.


Categories
Tips/Tutorials

Gear up for what you love to shoot

Gear for sale - one careful owner

As I noted recently, my ideal portrait shoot set up with probably be something like 2 5d Mk IIs sporting L-series primes of various lengths.

Which got me looking at my current lens set up. Here’s what I had:

Zooms:

Primes:

Of those, all the zooms cost more than either of the primes – the 24-105mm is around $1000, while the primes are around $400. (I’ve also got a plastic fantastic Canon EF 50mm f/1.8 II that I put on my old Rebel XT as a light knockaround camera when I don’t want to bring the 5D).

So you might think I’d do my professional shoots with the more expensive lenses. But I very rarely do. The 24-105mm I’ve used for school group shots and for a recent party session which was more like a studio shoot under controlled conditions. In other words, I’ll use it at times when I know I’ll have good light and need a pretty wide depth of field to make sure everyone’s in focus. Then the convenience of the zoom is handy, and it doesn’t compromise another element of the work.

But for the shots of individual children or their families, I always use one or other of the primes (normally I’ll start with the 85mm for the tighter shots and then stick on the 50mm for the wider and family shots).

Image quality is one reason for this choice (my medium level primes beat my more expensive zooms for sharpness and contrast), and low-light capability indoors is another factor – f/4 indoors doesn’t often give you a shutter speed fast enough to freeze the movement of a scampering child. The primes are also lighter than the zooms – a consideration if I’m shooting one-handed with the camera away from my face to keep the interaction with the subject.

But the creative reasons for using fast primes are the more compelling for me – not being able to zoom makes me think more about composition, and being able to blur the background using a narrow depth of field produces (to me anyway) more pleasing end results.

From Treat to Tool

With all this in mind, it struck me that it makes little sense to have a bunch of my money tied up in lenses that seldom earn me any money.

The reason for this is partly historical, and it also underlines one key difference between amateurs and pros when it comes to photo gear.

I bought all the zoom lenses before I really started taking my photography seriously as a career. Since I didn’t really know what sort of photography I was going to concentrate on, and it was just a hobby, it made sense to have lenses that covered a pretty wide range of focal lengths (from 17mm up to 200mm in my case).

And I didn’t have to show any return on investment for my lenses because I wasn’t doing photography for money. Just as when an amateur cyclist spends $3000 on a new bike, they don’t have to work out how quickly they’ll earn it back – it’s discretionary expenditure. Amateur photogs can spend whatever they can afford on whatever they like.

Pros, on the other hand, need their gear to put food on the table and can’t justify splashing out on something they’d merely quite fancy (not that it doesn’t happen, of course). Which is why many amateurs have much better and more up to date kit than some pros I know (myself included).

But now I know what I love to shoot – people – and that’s also what I get paid to shoot. I have enough experience to know that I live between f/1.4 and f/3, love the limits that primes impose, and also want great lenses I can use one-handed.

A Lens Cull

So I’ve just had a clear out of these excellent but (for me) unsuitable lenses. The 17-40mm and 70-200mm have gone, with the funds going towards a Canon EF 35mm f/1.4L.

I’ll keep the 24-105mm for now, but will only add new lenses if they’re my part of my ideal stable. Fortunately, it’s not a long list: in addition to the 35mm f/1.4 L, there’s the Canon EF 85mm f1.2L II USM (at a cool $2000 it’ll be a while before I get that puppy), and the Canon EF 135mm f/2L (which I rented a while ago and loved).

Upshot

The upshot is that I can only make these decisions because (after nearly five years of shooting a lot) I know what I want to shoot. If I was still an amateur (and had a bunch of disposable income) I’d probably keep the zooms just for the once or twice a year when I broke them out.

So try all kinds of photography – landscapes, architecture, sports, wildlife, street, portraits, studio-style fashion, whatever – with whatever gear you’ve got. Then you’ll get a feel for what you really like, and where you should invest. There’s no such thing as the perfect lens, or even the perfect set of lenses (unless you had the whole B and H catalog) – it all depends on what type of work you do.

And only buy something if you keep running up against a genuine limitation in your current gear.

Categories
Tips/Tutorials

Can you take good photos with a bad camera?

When I talk to parents about photographing their children, they often complain that they want to take better photographs but they don’t have a very good camera.

I tell them that you can take much better photographs with the camera you already have, before you need to splash out on a new rig. Most of these tips, for example, don’t rely on gear of any particular sort and will definitely improve your images.

I really like taking pictures with my old iPhone 3G which has a famously bad camera (even for a phone), and I’m happy with quite a few of the results.

So I thought I’d test out my assertion that the camera doesn’t matter as much as people think by shooting one day of a recent trip to Disneyland with an older point and shoot – a Canon Powershot SD500 (approx eBay value $40) and shoot the next day with my Canon 5D and a couple of good lenses (approx eBay value $900 for the body, and a total of $1100 for the lenses).

(In case you think I sacrificed priceless family pics for this test, this is the third time we’ve been to Disneyland, and with the in-laws living in LA, it definitely won’t be the last, so each image didn’t have to be a keeper.)

Day 1 – point and shoot

One definite plus for the little Elph is its size. It was liberating to be walking around without a heavy SLR around my neck, although I do it so often I’d forgotten what it felt like not to be carrying a brick with me.

And I got some shots that I was reasonably happy with – they’re not staggeringly good, but they captured moments from the day OK.

More background blur would have been nice, but this shot of waiting for the Dumbo ride is pretty good. Taken with the point and shoot.

But a couple of things were instantly apparent. One was that it was much harder to see what I was photographing – the viewfinder was tiny, and bright sun on the LCD meant I couldn’t use that for composition either.

Normally I'd shoot more of these type of shots to make sure everyone looked OK, but another pretty good result with the little Powershot.

The other instantly notable feature was the sluggishness between focusing and actually taking the photograph, and the lag before you could take a second image. Rather than firing off three or four shots of a our daughter with the characters, I was lucky to get one or two.

And I was never sure if the picture was actually taken when I depressed the shutter, or a short while after.

If you’re not completely in control when you shoot, and can’t take as many shots then the odds are less good that you’ll get a keeper.

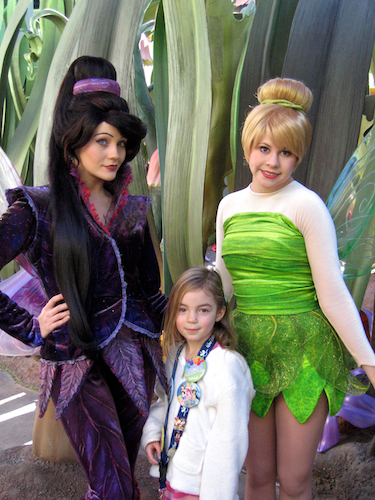
I try not to ‘spray and pray’, but there are some times when it’s the best way to ensure you got the shot (like when your daughter’s wearing her yellow princess dress while flying down the Grizzly River Run and getting soaked).

Lack of Control

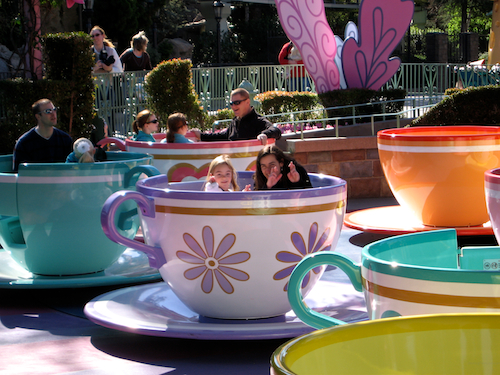
This is another big issue. With my wife and daughter riding on the Teacups I wanted to try to communicate the giddy speed by using a deliberately slow shutter speed to blur some movement (and then pan the camera to try and keep the subject in focus), but the Powershot wasn’t letting me.

So the teacups shots with it were just OK, but the wide depth of field (pretty much everything is in focus) and lack of blur take away from the drama.

Not so satisfying from the point and shoot. I couldn't blur the movement easily, and the wide depth of field makes everything look equally important (which it never is in a shot).

Back in the evening

So during the day, the little camera was just about acceptable so long as the photos I wanted to take were the ones it wanted me to.

Suddenly, a much happier photographer gets a shot he couldn't get with the little point and shoot.

We returned to the park in the evening, and this time I brought the 5D and a 50mm f/1.4 lens. The Powershot’s maximum ISO was 400, and the widest aperture was f/2.8 so there was no chance I was gettting any shots in the near-dark without using the flash – which would have produced unpleasantly unatmospheric shots.

More recent point and shoots do much better in low light, and while the 5D (mine’s the original model, not the Mark II) is only OK in dodgy light (for a high-end SLR), the fast f/1.4 prime gives you a setup it would be pretty much impossible to replicate with a point and shoot.

This simple shot of walking down Main Street (taken at 1600 ISO and f/1.8) just works so nicely – bokeh-ed background, subjects motion captured without blur, nice warm tones – and it’s exactly the sort of image the point and shoot would struggle with .

Next Day

The next day we were back in the park with the 5D and this time the 24-105mm f/4 L lens attached. And I was much happier. I could shoot small bursts of shots of my daughter with the characters, and the quality of the images produced was much higher – the colors and contrast deeper, and the sharpness much improved.

It felt like the camera was helping me get the image I imagined, rather than forcing me to take the pictures it felt comfortable with.

Being able to capture what you see instantly is the only way I could get this quick smile while we were waiting for a ride. The evaluative metering does a nice job of exposing the face and dropping the background to black, too.

Conclusion

Obviously this wasn’t really a test to see which of the two cameras is better, or even which I would prefer to bring with me to Disneyland. Any digital SLR offers much greater flexibility and image quality – I wonder how a decent Micro Four Thirds camera would fare.

I did this test party to remind me of the great strengths of SLRs – creative control, narrow depth of field, low-light capabilities, option to use a range of lenses, overall image quality.

But I also did it to see whether I could wring half-decent shots out of a not-so-good camera. And it’s certainly possible.

The technical image quality isn’t there with the old SD500, but if I wasn’t printing the files too big, I wouldn’t care too much. And I’m much happier to have the good if slightly imperfect shots I did get than not to have any at all.

So if you’re not shooting much because you don’t have the camera you’d like, just shoot with what you’ve got. You won’t get as many keepers as if you were shooting with a better camera, but you’ll get a lot more than not taking any photos at all. As the old saw goes, the best camera in the world is the one you have with you.

But if you’re already shooting a lot with your current camera and find yourself constrained by its limitations, now might be the time to make a jump to a new best friend.

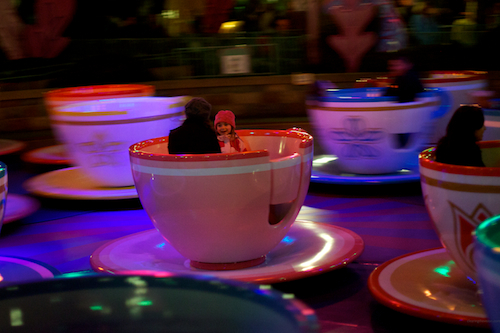
Finally, here’s the sort of teacups shot I wanted to get:

Categories
Inspiration Tips/Tutorials

Be the White House photographer in your house

P082509PS-0312

I’ve just finished watching the National Geographic documentary, The President’s Photographer, about the White House photographer Pete Souza (it’s available on Netflix on demand streaming if you’re a US subscriber).

It’s a fascinating look at an amazing job, and I admit to having a bit of a photographer’s crush on Souza. Partly it stems from his great book of images from President Obama’s career in the Senate and from his campaign, The Rise of Barack Obama.

One of the key things that struck me from the documentary was the sense of purpose that all the official White House photographers interviewed had in documenting everything that happens with the President. Every image captured ends up in the Library of Congress, for future scholars and historians to access.

This includes the formal events, the countless handshakes and speeches, but it also covers the more domestic and personal moments.

In fact these smaller scale images (particularly from Souza) are some of my favourites – and because of the White House’s enlightened picure usage policity, I include some of them in this blog post. These have an importance to a wide audience because of the post the man occupies, but a lot of them would be great images even if he wasn’t the President.

P111410PS-0669

We’re not heads of state, but the idea of documenting the day to day life of our families also has great merit. These moments are priceless, too, if only to us.

And now because of digital cameras, phones that can shoot video and essentially limitless storage, we can capture and keep records of our own lives more easily than ever before.

Waiting until the special occasions or holidays to bust out the camera misses most of what’s really important in a family – the daily details, triumphs and joys.

So let’s all be our own official photographers, bearing witness to our lives and keeping a record for ourselves later and for future generations. It won’t be in the Library of Congress, but it’s no less important for all that.

Categories
Children's portraits Tips/Tutorials

New guest Post for DPS: 10 Tips to Help You get the Most out of Your New DSLR

The nice folks at Digital Photography School have posted another of my guest posts for them: 10 tips to help you get the most out of your new DSLR.

It’s aimed at people who might have just got a new camera over the holidays, and are wondering where to start.

And if you’ve just arrived on my site from reading the DPS article, it’s great to see you, and please think about following me on Facebook or Twitter, or subscribing to the email newsletter for the site.

Categories
Tips/Tutorials

What my dog taught me about how to use reflectors

I don’t do pet photography professionally very often, but I find myself taking photographs of our own pets a lot.

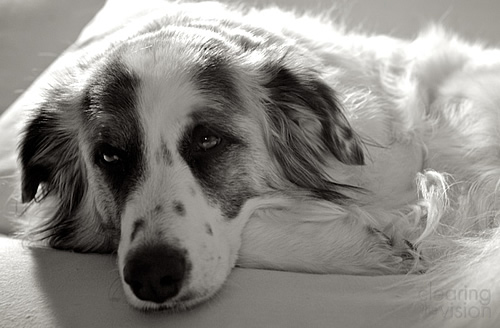
Our big sweet Aussie shepherd/Great Pyrenees dog Corrie presents some particular problems when I have a camera in my hand. She’s mainly white with some black on her face, and has deep brown soft eyes.

The dynamic range (from the darkest part of the image to the lightest) is so broad from her white back to her black head that it’s very hard to get a good exposure of her. Unless the lighting is just right, either I expose for the face and her back is blown out, or I expose for her back and her face and eyes are too dark.

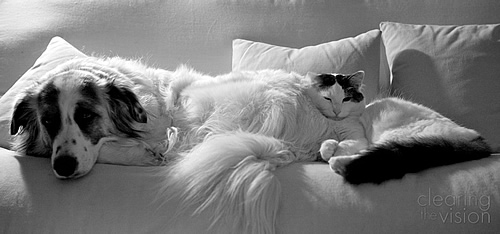
The other night when she and the cat (named Colin Feral) were curled up together, I grabbed the camera and tried to get some shots. The pets were lit predominantly from a light behind and above them, with only a little fill coming from a more distant light in front.

There wasn’t enough illumination from the front to light the dog’s face properly. Her eyes were black pits with no detail in them, even though the exposure on her back was borderline too hot. What I needed was some way to even out the lighting while not making it too harsh.

Not too bad, but Corrie's eyes are dark.

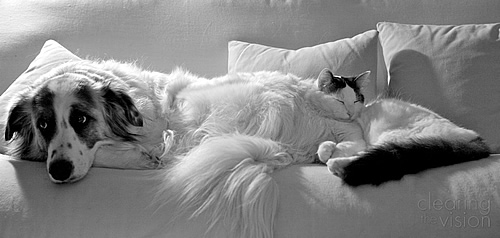
Fortunately we’re in the middle of putting up a new picture rail so there were some framed images to hand which had white foam core on the back of them – a pretty good reflector.

I propped one picture up up below the dog to bounce some of the light from behind her up into her face, giving more even light and a much more attractive photograph.

Much better - we can see her sweet sad eyes.

While I was watching Tamara Lackey’s great Creative Live workshop of children’s portrait photography, I was struck when she said that she uses a reflector (probably not the back of a framed picture) on pretty much all her shoots.

I’ve used my real one a bit, mainly for more considered portraits of older kids, but her technique of shooting round it one-handed while chasing smaller beings around was pretty impressive. This sort of flexibility means you can use it in a lot more situations, but you have to get good at balancing camera and reflector.

Waving it around loosely won’t help you unless it really is bouncing the light the way you want it to. So I’ll be getting in more practice with the dog.