Categories
Children's portraits Tips/Tutorials

Imagine you’re talking to a friend – how to tell a story in your photos

In one of my other lives, I’m a journalist and writer. I used to write for The Irish Times in Dublin, I’ve published a book of travel writing (it’s a lasting regret that it has no photographs in it, but at the time I was taking rubbish photos), and I now write for New Mexico Magazine and other places at times. (I outlined what I learned about photography from being a writer here).

I’m storyteller when I’m stringing words together. And I’m increasingly realizing, they key to good images (at least of the style I prefer) is to be a good storyteller when you’ve got a camera in your hand.

A good picture, or a set of pictures, tells a story. Images can be beautifully lit and technically perfect, but if they doesn’t say something, then what’s the point?

Everything in the image needs to contribute to the narrative you intend. Sometimes what you’re trying to say is simple – this is a happy girl – but for more complicated events, it’s worth having a think about how best to get your message across: what to include and what to leave out.

Imagine you’re talking to a friend

Ashley Biggers, my talented editor at New Mexico Magazine recently made a suggestion about a travel piece I’m writing for her, which is also appropriate to making images at an event or portrait session:

‘Imagine you’re excitedly telling your friend about the best parts of your visit. What would you say?’

This gets to the heart of the matter – you wouldn’t start at the beginning and give equal importance to every last thing you did (‘First I drove there, then I parked the car, then I put on my coat . . . ‘), but you also wouldn’t spend all your time talking about one aspect of the event.

So in photography terms, you wouldn’t photograph everything, or only take lots of the same sort of photographs.

Some things are just more important than other things, and you’ll get excited over some things and not others – so keep asking yourself what those key things are and make sure you show them clearly.

Telling the story of a party

Our daughter had her sixth birthday recently, and chose a princess theme for party (naturally).

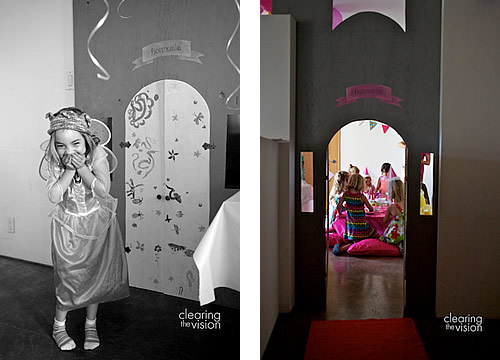
My wife had spent a lot of time and effort preparing the room for the party, going so far as to build a castle facade with working doors (she’s an architect).

As I photographed the event,  I wanted to make sure I set the scene with the images, as well capturing the key events.

When we look back in years to come, some of what we’ll want to recall will be the way the whole thing looked, not just tight shots of our daughter.

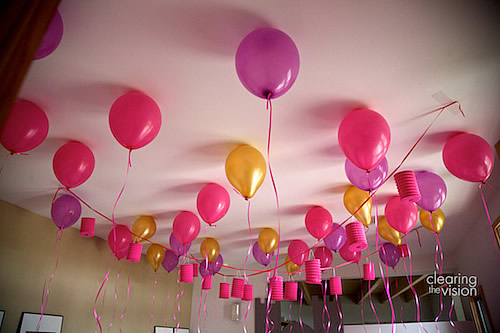
So if I’m telling you about what the party was like, I’d start with ‘The room looked amazing. We had tons of balloons all over the ceiling.’ (as you can see from the photograph at the top of this story)

‘There were princess sceptres to decorate. And Miss F’s mum made a fabulous castle facade with working doors and ramparts and stuff.’
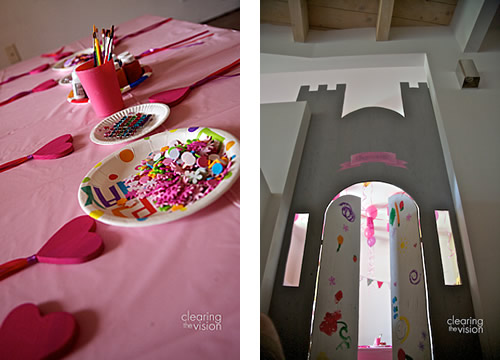
‘Each time a new guest arrived, Miss F closed the door and then got really excited when they knocked and asked to come in. And all the princesses looked so cute sitting down at the table in their ‘castle’.’
‘They went outside and our older friend read them princess stories.’
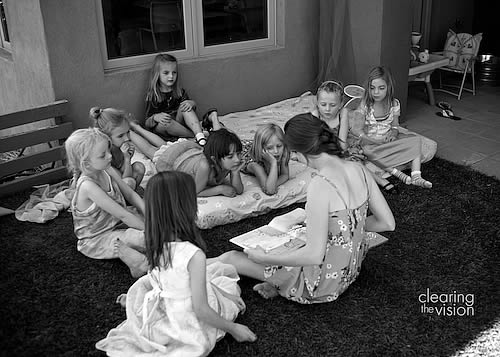
If the photographs do their job, then the text descriptions are unnecessary – and the images add some details and visual appeal that the words don’t contain.

I have the obligatory photographs of my daughter blowing out the candles as well, but some of these wider shots (all taken with a 35mm lens) tell a more complete story of the day.

So don’t be afraid to shoot wide, and imagine you’re talking to someone about the highpoints of the event you’re photographing.
Categories
Personal

Photography lessons from my father, the musician

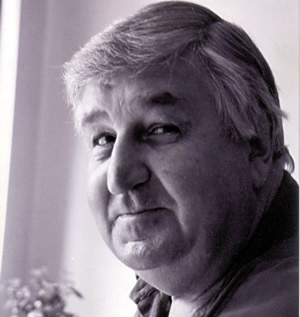
My Dad, Jim Moore. Photo by yours truly when I was in college I think.

On this Father’s Day, it’s time for a quick look at just three of the many things I learned from my Dad, all of which are related to photography in some way.

1) Follow your folly

Before I was born, my Dad was a jazz musician. He played on cruise ships that went around the world in the 1950s and 60s. Pretty cool, right? This was a working class boy from Wealdstone in west London – not known as a hotbed of the jazz scene – but despite the many reasons not to, he earned a living playing summer seasons in English seaside resorts before taking to the high seas for some amazing experiences.

Even back on shore working a regular job as my sister and I were growing up, he’d still play semi-pro gigs on a lot of Saturday evenings. I fondly remember him doing a quick soundcheck in the hall by the front door as the football results came in on Saturday evening.

He’d play the theme from the kids’ TV programme The Wombles before loading the car up with the big Vox amp and electric bass and heading off to play at a dinner dance somewhere.

I was in a band in college, and still plink on the guitar a little bit, but the larger lesson he taught me is that it was worth taking a punt on what you really wanted to do, even if you have to hold down a day job too.

2) Old Ektachrome slides make the world look great

Safely back in Buckinghamshire from his travels, Dad had a bunch of slides he’d taken on his adventures. On rainy weekend afternoons we’d occasionally get out the little slide viewer (that kind of looked like this one) and go through some of the boxes.

There was the Sydney Harbour Bridge; there was Dad with his double bass standing under a Sunset Boulevard sign in LA (how strange that fifty years later my in-laws would live just off Sunset in West LA). Backlit by the viewer, the skies in the slides looked a deep deep blue, the exotic locations tantalising, and my Dad cut a dashing figure (jazz men always look dapper).

3) Letting your kids commandeer a present can be worth it

One Christmas when I was a teenager, my Dad got a SLR as a present from Mum. It was a sturdy East German Praktica and it came in a light brown bag with a shoulder strap. Mum also bought a little introduction to photography book.

I don’t know how interested Dad was in photography, to be honest (up to that point most of our family photographs were from a succession of cheap Kodak point and shoots), but I pored over the book, and Dad kindly let me use the camera quite a bit.

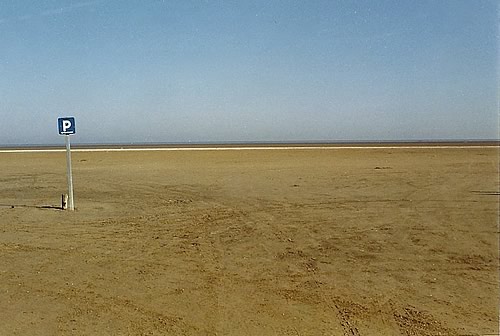
Exhibit A - from a trip to Brittany in c. 1992. Clean strong landscape.

I can’t remember what kind of lens it had on it – definitely manual focus though. I ended up using it more than my Dad, but disaster struck when it was stolen while I was taking a shower in a Venice youth hostel while on a trip during college.

I reported it stolen and with the insurance money (based on a generously inflated estimate for replacement from the local camera shop) we bought one of the first autofocus Canon EOS 35mm cameras (a Canon EOS 1000 with a Sigma zoom).

By this stage I’d basically commandeered the camera with my Dad’s blessing, and I pootled around running plenty of rolls of Ilford XP2 film through it – black and white film that can be processed using standard C-41 colour processing systems.

Now when I look back at the images, I’m still proud of some of them, and they clearly show the twin paths that most of my work has taken. First (see Exhibit A above) is the clean almost abstract landscapes that I sell on my Etsy store, and second (see Exhibit B below) is the photojournalism-style children’s portraits that people hire me to shoot.

It would take me nearly 20 years to come back to these two types of work and take them more seriously, but there was definitely a seed sown in the early 90s, thanks to that camera.

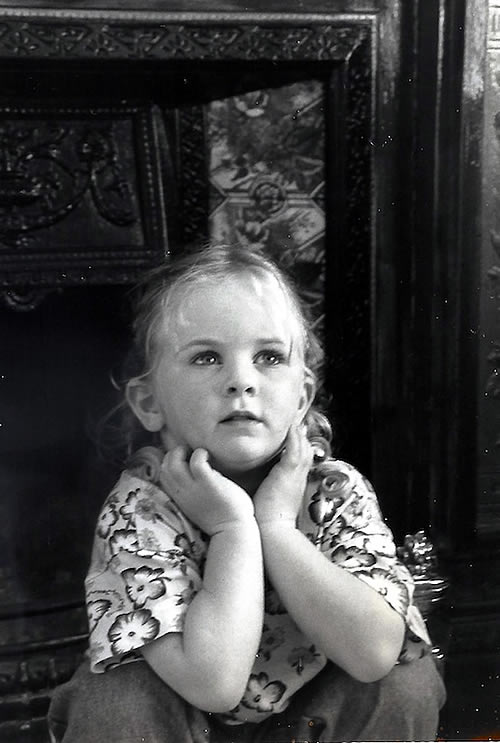
Beautiful cousin Sarah c. 1993, taken in our Aunt Pauline's front room. Sarah graduated from architecture school last year, and it's a bit embarrassing for me that it's take most of her life for me to realise I should be taking more photographs like this one.

I still have the old EOS 1000, and after a pause when a) I mistakenly thought the camera was irreparably borked and b) I foolishly had my head turned by succession of rubbish digital point-and-shoots, it was that camera I picked back up when my daughter was born – the first step on the path that’s brought me here.

So have a good Father’s day, Jim Moore. And thanks for the loan of the camera. Think I’ll get a new battery for it and shoot some rolls of XP-2  with it, for old time’s sake.


Categories
Children's portraits Santa Fe Tips/Tutorials

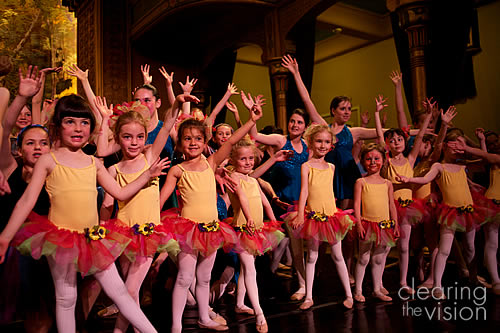
It’s Showtime – tips for shooting a ballet performance

Recently I took photographs at my daughter’s ballet class, and really enjoyed the experience.

So when I arranged to take photographs of her class’ dress rehearsal and performance, I was looking forward to it immensely, but it threw up a new set of challenges that I had to deal with.

The practice studio had been bright, spacious and very easy to shoot in. I could follow the girls around, changing my point of view to get the light I wanted or minimize some background clutter.

The location for the performance on the other hand (the theatre of the Scottish Rite Temple in Santa Fe) was dark and cramped (at least around the stage).

Gorgeous and fascinating. no doubt, but dark and I couldn’t move around at all.

At least for the dress rehearsal, I was able to squat down just off the stage, but that’s where all the girls from the other classes were waiting, so it was all a bit tight.

Allegra Lillard, the amazing Director of Dance for Joy, kept everything moving smoothly and energetically, but like any dress rehearsal there was some waiting around.

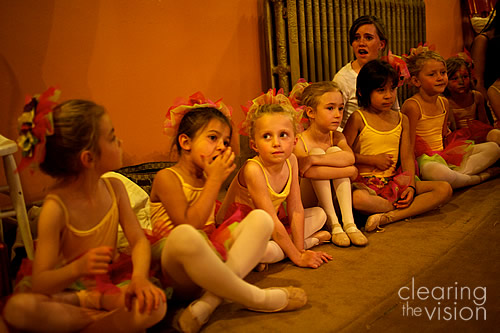
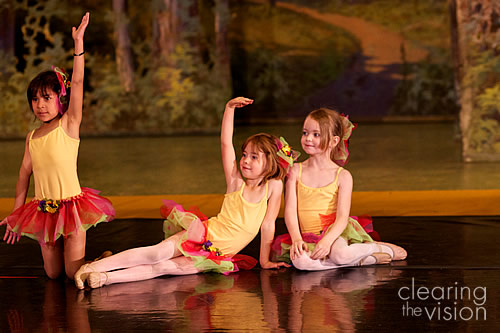
Even sitting up against a wall waiting for their turn, there’s something hugely endearing about little girls in full ballet outfits. My daughter’s class were models of patience until it was time to practice the grand finale – the first time they’d been up on stage with all the other (older) classes.

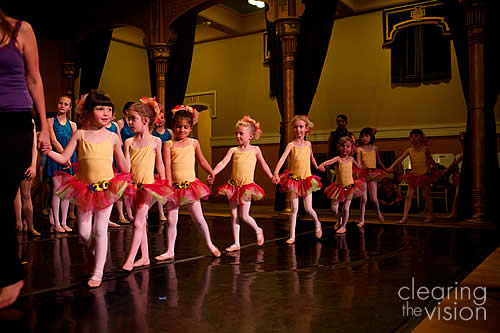
They were a little nervous going on to the stage, but soon reveled in their place in the limelight.

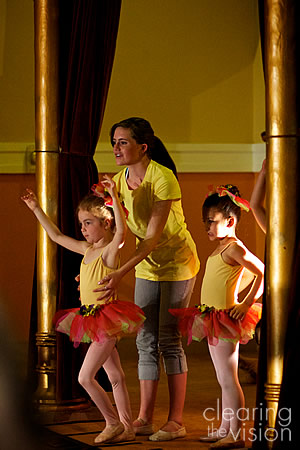
Practicing their own number came next, and they ran through it like small seasoned professionals.

If the rehearsal was tricky, then getting shots on the day was going to be even harder.

The house lights would be down, so the gorgeous space was even darker, and I was confined to my seat in the fourth or fifth row.

But I brought the camera anyway, and hoped for the best – the rich warm stage set and lavish surroundings were too good to miss, when combined with little ballerinas.

The ratio of keepers to rejects wasn’t that great, but I was very happy with those I got.

Four tips for capturing ballet

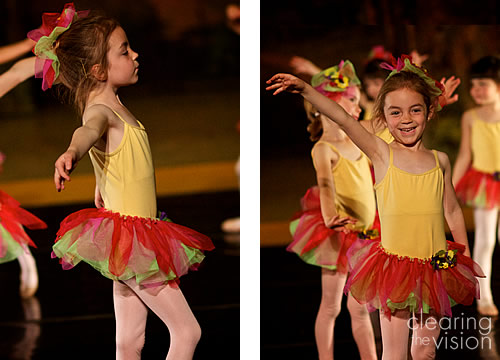
1) Choose your moment – in any performance, there are moments of stillness that are worth looking out for.The image above left captures a point when my daughter had momentarily struck a pose – it was the end of one gesture, just before the start of another move, and as such it has a strength that works well. It’s certainly possible to get a great shot in mid-twirl or run (and these would communicate more dynamism than poise), but it was the quieter moments that appealed to me (and they’re easier to get right, especially if the light’s dodgy).

2) Tell the whole story – With children, you want to tell the story of their whole experience, not just the performance. So the shots of waiting around, being ushered onto the stage, or their big smile afterwards at the curtain call are all as valuable as your images of their performance itself. With older children or adults, you might want to emphasize the performance itself (their technique or form,  or timing with the other dancers). But with younger kids, the imperfections of their performances make their personalities shine through.

3) Think both wide and narrow – It’s tempting to think you should just go with the longest lens you have, but you might miss some good compositions that way. I shot with my now-standard combination of two bodies, one with with a 35mm f/2 and one with an 85mm/f1.8 on the other.  It partly depends how far you are from the stage as to what your focal length options should be, but you’ll want to be able to capture most of the width of the stage for the shots of the whole group. You’ll also want enough length for picking out individual poses and expressions.

4) Keep the shutter speed as high as you can – to freeze the movement (unless you’re going for a nice deliberate blur to communicate movement), then you’ll want to keep the shutter speed above 1/100 at the slowest. Some of the above images were shot at around 1/100 sec f/2 or f/3 at ISO 1000, with the ISO being pushed up to 4000 for some of the performance  shots. I’ll take some digital noise on an otherwise sharp image than a noise-free shot of messy blur. So bump up the ISO and/or shoot as wide open as you can (i.e using a lower f-number to let in more light)

Categories
Children's portraits Tips/Tutorials

From pixels to products – Why you should print your photographs

If you’re a digital photographer, then you’ve likely got hard drives full of images. Some of them you’ve hardly looked at since they were imported, while others you’ve slaved over in processing, and shared widely online.

But until you’ve printed them out, your images haven’t lived a full life.

It’s been busy here over the last few weeks as I shot and printed the preschool class photos and ‘day in the life’ project images, as well as ballet rehearsal and performance images. Client orders came in, and got turned into boxes containing prints, books and other goodies.

It underlined to me how much I enjoy making the images I make real. Here are a few product ideas that went down well recently:

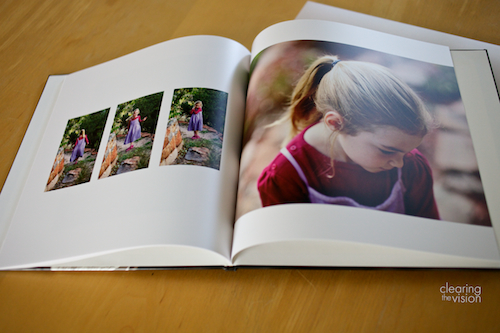
1) The Luxe Book

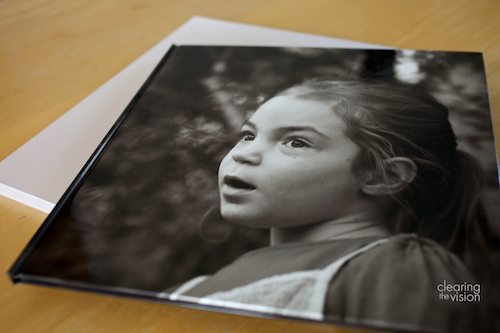
For me, a custom-designed high-end book-bound album is the ultimate way to the tell story of a child at a certain age, or an event or class, for that matter. We’re wired for stories, and the ordered collection of images creates a narrative that draws you in.

I use Japanese-produced books from asukabook.com that offer amazing print quality and feel great in the hand. Imagine the most beautiful fine art coffee-table book you’ve ever seen, and now imagine your family’s images in that book. Consumer-grade self-fulfilled books (from Blurb.com, for example) offer a great way to get images into print, but Asukabooks are something else again (and are only available through approved professional photographers and designers). If you’re in Santa Fe, give me a shout and I’ll be happy to show you one of our samples.

As objects that you’ll enjoy for a very long time I think they’re unmatched. They work really well for families who want a lasting record of their session but aren’t the type of folks to display large wall art (which seems to be a regional thing – I know it happens elsewhere, but people here don’t go for a large family group print to go above the fireplace).


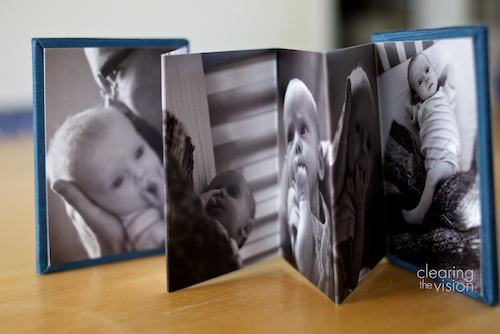
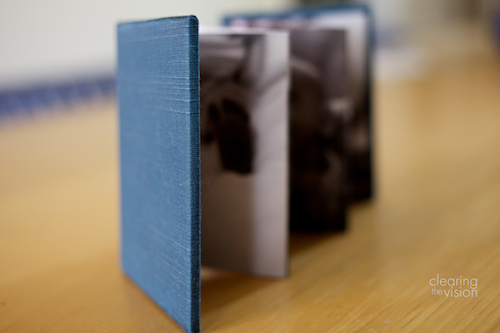
2) The Mini Accordion Book

Wallet-sized prints are great for carrying around, or giving to other family members, but they’re easily scuffed or dog-eared. A nice solution to this portable gallery problem is the small fold-out concertina book. The ones we use offer an elegant matte finish to the paper, a choice of silk covers and little magnetic closure so they don’t open up in a handbag. Grandmas love them as small portable brag books.

We get ours from ProDPI.com (professionals only again, I’m afraid), who do an excellent job of the printing and putting together.


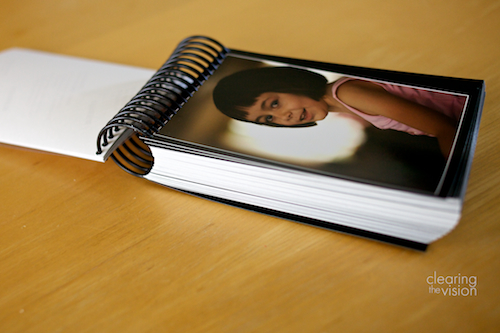
3) Coil Bound Books


Pros often use these as proof books to show clients all the images from a big event to help them decide which ones they’ll order larger or include in a custom-designed book. They’re regular 4 x 6s or similar sizes printed on pro-grade photo paper then punched and coil-bound. With one image per page (I like mine with a border) they’re quick and relatively inexpensive to produce. For the Gentle Nudge day in the life shoot and the ballet rehearsal shoot, I had a book printed up so the parents could flick through all of the images easily.

I hadn’t planned it, but I got some orders for the whole book. For a self-contained event, like a party, for example, they make a nice object. Not as formal or beautiful as a custom-designed and printed book, but nice nonetheless. Ours come from ProDPI, but Mpix.com and Shutterfly.com both offer something similar, and you don’t need to be a pro to buy from either of those.


4) Any size print

People seem to study physical prints in a way they don’t look at the same image on screen. I really enjoyed handing out the 8 x 10 class photos to some of the parents on the last day of school and watching them pore over the faces. Larger is better, but even it’s just a set of 4 x 6s, I really believe it’s worth getting prints made regularly.

But if you’re going to print them, promise me you won’t take a disk to the local Walgreens or Target (if you’re in the US – if you’re elsewhere then I’m sure you have similar neighborhood pharmacies or one-hour print shops). You’d be amazed how differently different labs will print the same image, and it’s worth spending a little extra to get something you’re going to be happy with.

I use a pro lab for most of my printing needs, but on the regular consumer side, I’ve had good results with Shutterfly and especially Mpix.com which a branch of a big pro printing lab, so you might want to give them a try. Smugmug the photo sharing site run by people I have a lot of time for recommend BayPhoto, so they’re another suggestion.


Whether it’s the high-end coffee-table book or an envelope of floppies, I’d urge you to free your images from the backlit screen one way or another.